
In our busy work lives, we often forget to WhatsApp our loved ones. Looking at how regular my parents are messaging me with inspirational quotes and health tips first thing in the morning, it was time to reciprocate.
In this tutorial, we will write a simple Python script to send a WhatsApp message every morning. Twilio is the Python package we will use. To run it every day at a certain time, we’ll put our code on the AWS (Amazon Web Services) cloud.
So, let’s get started!
One solution is to use Python’s Selenium package and go to WhatsApp web rather than using Twilio, which is subscription-based after the free tier is over. But as WhatsApp requires QR-code scanning through mobile from time to time, automation isn’t possible.
To let your parents know you’re parents thinking of them everyday (kind of), we’ll do this in a three-step process:
- Initially setup your Twilio profile.
- Understand the code and modify it.
- Put our package on AWS lambda with triggers.
Step 1: Initially setting up your Twilio profile
Firstly, create a free Twilio account and confirm your email address and mobile number. Also, a free tier Twilio account requires using Twilio Sandbox for WhatsApp, which means you can’t use your number and have to go through one-time permission to receive WhatsApp messages. Both can be solved when you get your own number, which is done after WhatsApp approves Twilio to use your number. There is a form to fill out and a wait time too.
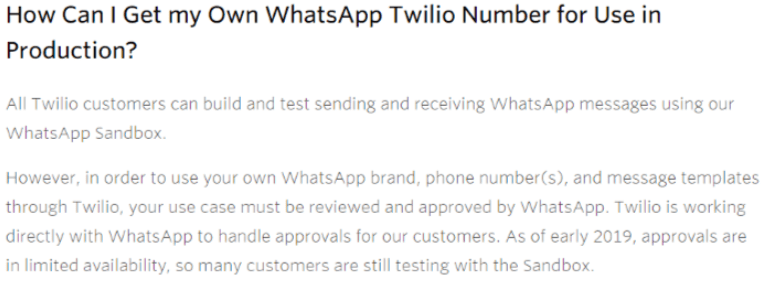
All of this may be discouraging, but the free tier solution does the job fine. Also, for now, this is the only available way. Now you have to connect the receiver’s phone to the WhatsApp Sandbox to start receiving messages. To do this, head to WhatsApp beta in the learn section of the console.
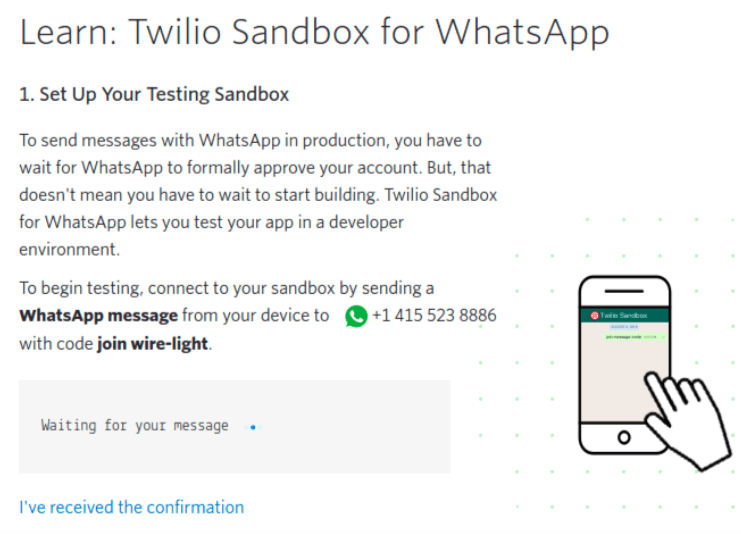
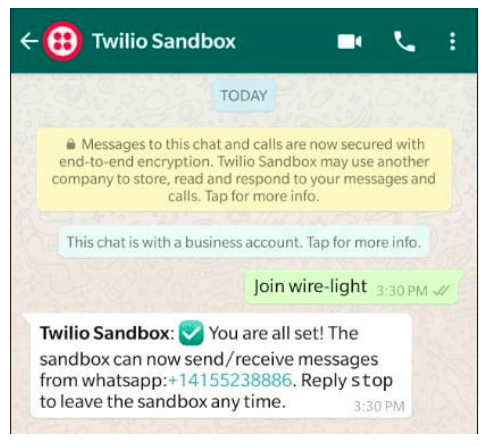
Now, save the WhatsApp number assigned to you in your contacts — you can give it any name you want. For simplicity, I saved it as Twilio Sandbox, then sent it a message from my dad’s phone, as seen above. This has to be done once and only once.
Now go to the Twilio Console and retrieve your account SSID and authentication token. This will help Twilio know it’s you when the code is executed.
Step 2: Understanding and modifying the code
Download the GitHub repository and extract it. Inside this, you’ll find your code file and deployment package:
whatsapp_messaging.pyaws_lambda_deploy.zip
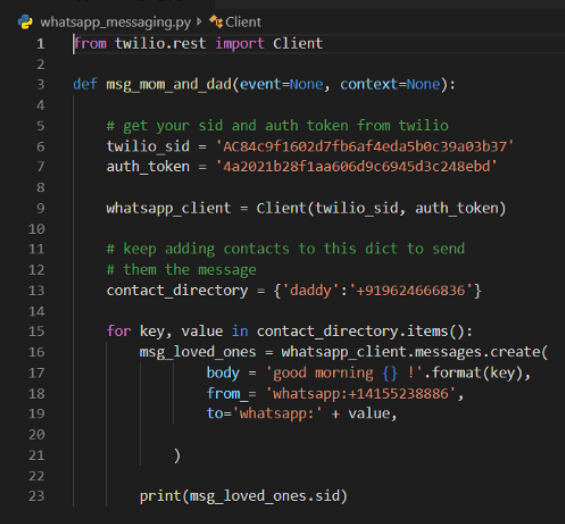
- line 1 imports the Twilio package and uses its
RESTclient to hit the Twilio API. - line 3: We create a function,
msg_mom_and_dad, which will be given to AWS to run every day at a certain time. - line 6–7: Replace the
sidandauth_tokenof your account as discussed in step 1. - line 9: Twilio client object is created with our credentials.
- line 13: A Python dictionary is created with name as
keyand mobile number asvalue. You can keep adding to this Python dictionary to send messages to more people as well. - line 15: A
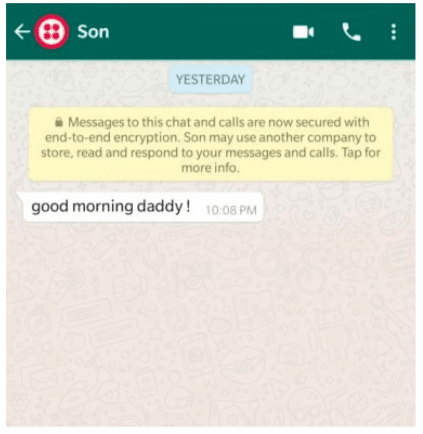
forloop that runs through all thekeyandvaluepairs (currently we just have one). Inbody, mention your message. I have created a simple one, which says good morning, followed by thekeyvalue. In the above code, it is “good morning daddy!” We then mention thefromnumber, which is the Twilio WhatsApp number you got earlier, and thetonumber, from which you previously sent the WhatsApp sandbox confirmation. - line 23: A line to check message status by printing the SID. We won’t use this anyway.
Now, we have five things to change:
twilio_sidauth_tokencontact_directoryfrom_body (optional)
After you have changed these, save it. Then extract the aws_lambda_deploy.zip and replace the whatsapp_messaging.py inside it with your newly created one. Zip the package again. We just wanted to change the code with your credentials and contact details. Your deployment package is now ready.
Step 3: Put your package on AWS Lambda with triggers
Our code is ready to run and send WhatsApp messages! If you’re wondering what the other files in our deployment package are, they’re the Twilio package and all its other dependencies. This is because we’ll use an AWS Lambda function in a Python environment that doesn’t have the Twilio package. But why not just runpip install twilioto install it? This is because we don’t have a server here.

AWS Lambdais a serverless computing service where you have a piece of code you want to run based on different AWS events and triggers, according to the users’ needs. Therefore, it’s a waste of computing resources and money to run a server (EC2 instance in AWS) 24/7 to do our small task. Here, our Lambda function will only run for a very short time every day on our mentioned time trigger.
The Lambda service is very cheap and gives you a million requests per month for free.
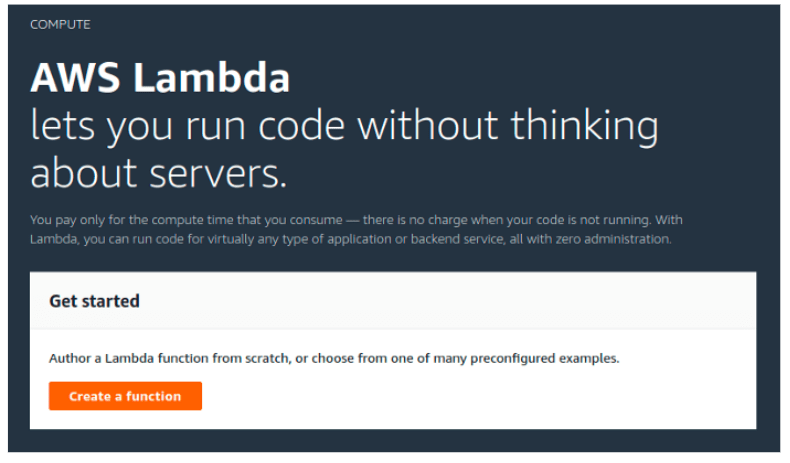
So, our next step: Log in to AWS Amazon. Then, select Services -> Compute -> Lambda -> create a function.
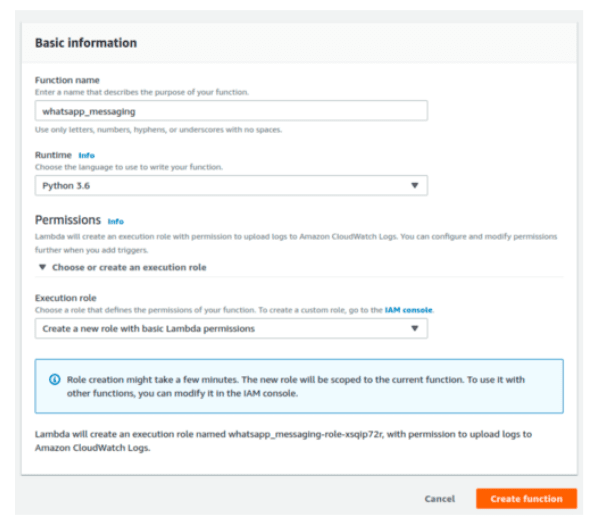
Once you’ve completed those steps, it’s time to give your function a name. We selected Python 3.6 as our environment of choice as we don’t need to connect to other services in AWS, the option of basic permission is fine. Now, click oncreate function and you’ll be taken to the main dashboard.

In the function code block, specify to the Lambda Function Handler that we want to run ourwhatsapp_messagingPython file and themsg_mom_and_dadfunction inside it each time the Lambda function is called. To do this, change the handler value as above.
At the code entry point, selectupload a .zip file, upload the deployment package you created in step 2, and saveit. Our code is ready to run. You can click ontestand check that the function successfully sends a message to the specified WhatsApp number.
Our last step is to trigger it every day at a given time. To do this, click add trigger > CloudWatch Events in the designer box.
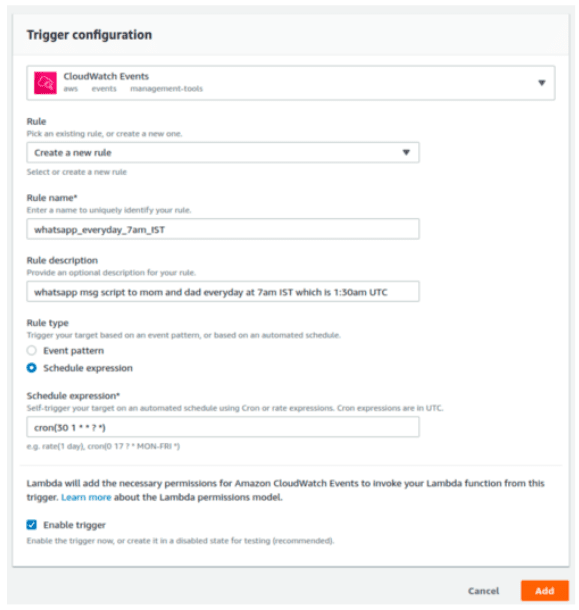
We’ll now have to create a new rule. You can give it any name and description you want. Then, set the rule type asschedule expression. We specified the time usingcron().30 1refers to 1:30 am, UTC (equivalent to my 7 AM, IST time). The next two,* *, are for the day of the month and the month. The next two,? *,are for the day of the week and year. We set*and?to specify every day, month, and year. You can refer to the example below to create your owncron parameters. Otherwise, you can refer to thecron guide onaws_cron_docsto learn it in depth.
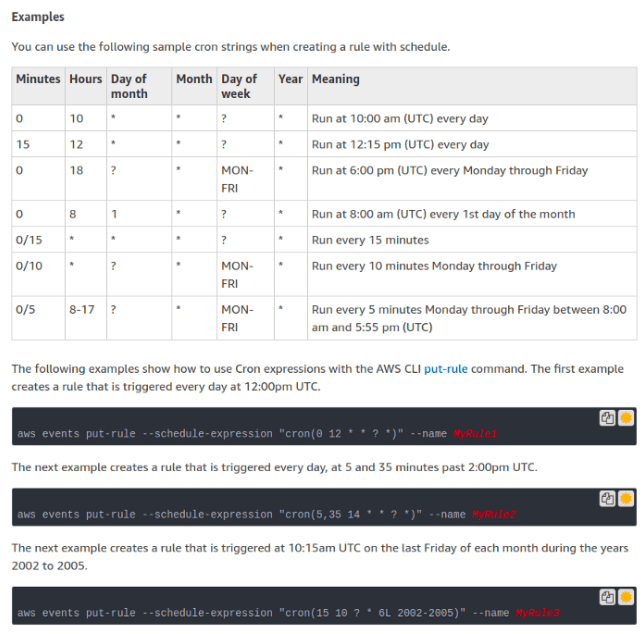
After you’re done! But make sure the Enable trigger checkbox is checked. Finally, click the add button.
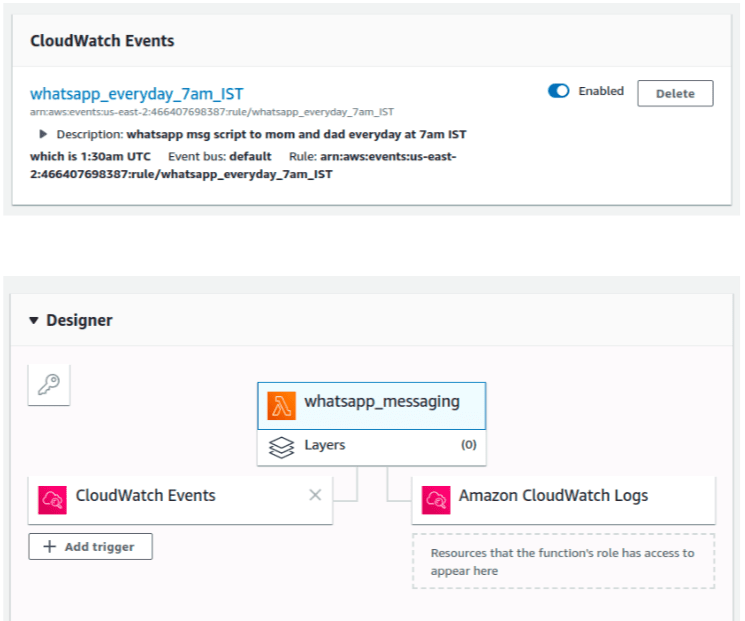
On the Lambda function dashboard, you can now see your CloudWatch Event attached to your Lambda function. Upon scrolling down, you can see the CloudWatch event enabled to trigger your function.
That’s it! You can change the Twilio Sandbox name to your name and can even respond to replies from the Twilio dashboard. You truly are the favorite child.
This article was originally published on Better Programming by Kartik Nighania, a Software Engineer at HSBC. You can read the original article here.
Get the TNW newsletter
Get the most important tech news in your inbox each week.


