If you’re anything like me, you’ve probably wondered at some point if you’re spending too much money on coffee. Spoiler: you probably are.
Upon realizing this myself a few years ago, I set upon a journey to learn to make my own coffee — the type of espresso-based drinks you tend to get at a hip coffee shop, in particular. Now I’m here to spread the love and help you get started on your own journey.
First things first: Keep in mind this guide isn’t meant to be a comprehensive guide to espresso gear, nor do I intend to go deep into the specifics of perfecting your brew. There are much better resources for this.
Instead, I hope to set you off on the right foot with the gear I’ve actually used myself regularly to deliver espresso shots that can rival the typical coffee shop — for much less money in the long run.
What makes espresso different from other coffees?
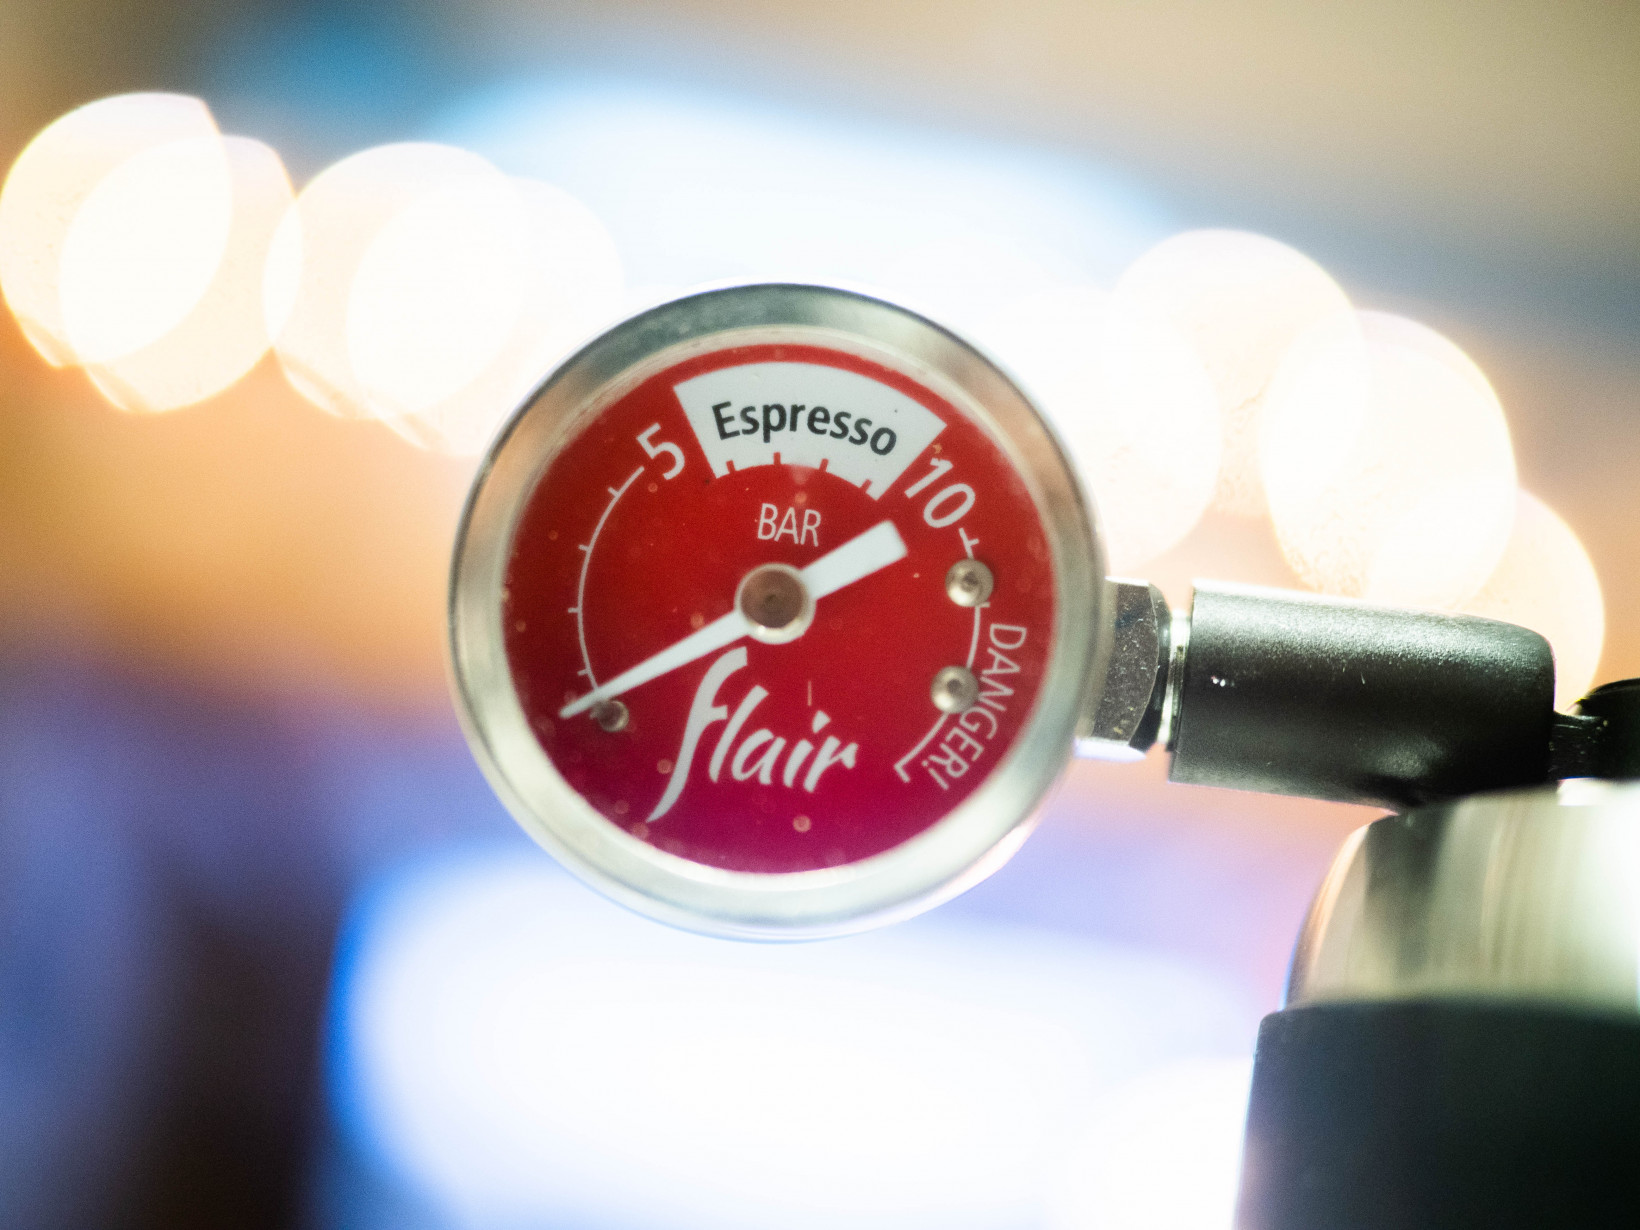
This guide is specifically for espresso. Espresso differs from most other brewing methods in that the coffee is brewed under intense amounts of pressure, usually anywhere from 6-9 bars.
Long story short: this allows you to extract more caffeine and flavor compounds per gram of brewing water used. That means far more concentrated coffee than most other brewing methods, typically resulting in bolder, more complex flavors.
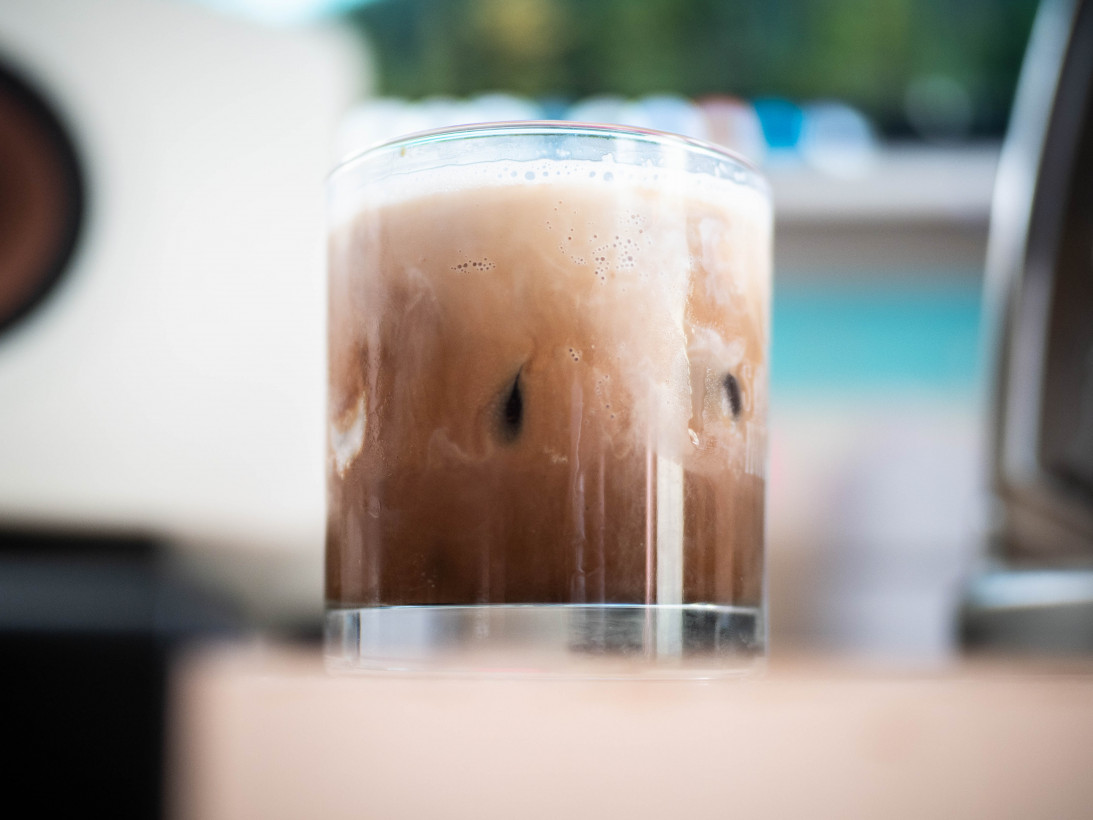
Because espresso is so concentrated, it also allows for ample flexibility to combine with milk, resulting in the oh-so-popular lattes, mochas, cappuccinos, and other coffee shop staples. (Fun fact: replicating the perfection of the iced mocha at one specific Brooklyn coffee shop was the very reason I set out to become an amateur barista.)
That said, for those of you who want to be as caffeinated as possible, keep in mind I’m talking about caffeine density above. The typical cup of drip coffee or cold brew will still have more caffeine than a regular serving of espresso, simply because the amount of espresso people drink (say, in a latte) in one go is usually much smaller.
Of course, once you know how to make your own espresso, you could make yourself five servings in a row, if that’s your heart’s desire. But, umm, you probably shouldn’t do that.
What do I need to get started?
There is some investment required for making good espresso at home, but this guide is meant to help keep things on the lower end of the price spectrum. By that, I mean roughly $300-$600 in total setup, which might seem like a lot compared to, say, buying a $40 french press, but it is indeed on the low end of the spectrum for espresso.
More importantly, if you’re the type of person who buys a latte several times a week, it will likely pay for itself in a matter of months.
There are three key things you need for good espresso:
- Fresh coffee beans, ideally roasted within the past three weeks or less.
- A good burr grinder (as opposed to a blade grinder, these are useless for espresso).
- A good espresso machine.
I cannot stress enough the importance of having fresh beans and a good grinder. They are even more important than the specific espresso machine you use.
I’d also highly recommend a cheap small kitchen scale. As long as it’s accurate to 0.1g increments, you should be good to go. Eventually, you might figure out how to ‘eyeball’ it, but your coffee will be much more consistent and easier to modify with a scale.
What beans are the best?
I’m of the mindset that any type of coffee bean can be used for espresso, as long as it’s freshly roasted. Look for brands that explicitly print their roast dates on the packaging.
If you’re just getting started, it’s often useful to simply go to your local coffee shop and ask which type of coffee they use for espresso; they’ll usually have a few bags for sale. My experience is that most coffee sold at coffee shops will have the roast date on them as well.
There are also myriad great coffee roasters online that will ship to you directly after roasting.
As for flavor profiles and roast type: experiment! That said, I think a medium roast coffee is a good place to start. Contrary to popular belief, lighter coffee roasts typically have more caffeine than dark roasts, and a medium roast will be less finicky than a light roast.
What type of grinder should I get?
There are dozens of grinders out there at all sorts of price ranges. I’ve extensively researched just about every major product on the market over the years, but I haven’t tested most of them. So instead, I’m recommending products I’ve actually used and have had good experiences with.
A burr grinder is essential. A blade grinder will cut pieces unevenly, leading to uneven coffee extractions, if it can even grind fine enough in the first place.
There are two ways I’d approach choosing a grinder depending on whether you put more emphasis on convenience or quality. At the smaller budgets this guide is designed for, that essentially equates to whether you want to use an electric grinder or a hand grinder, respectively.
What if I want the most convenient grinder?
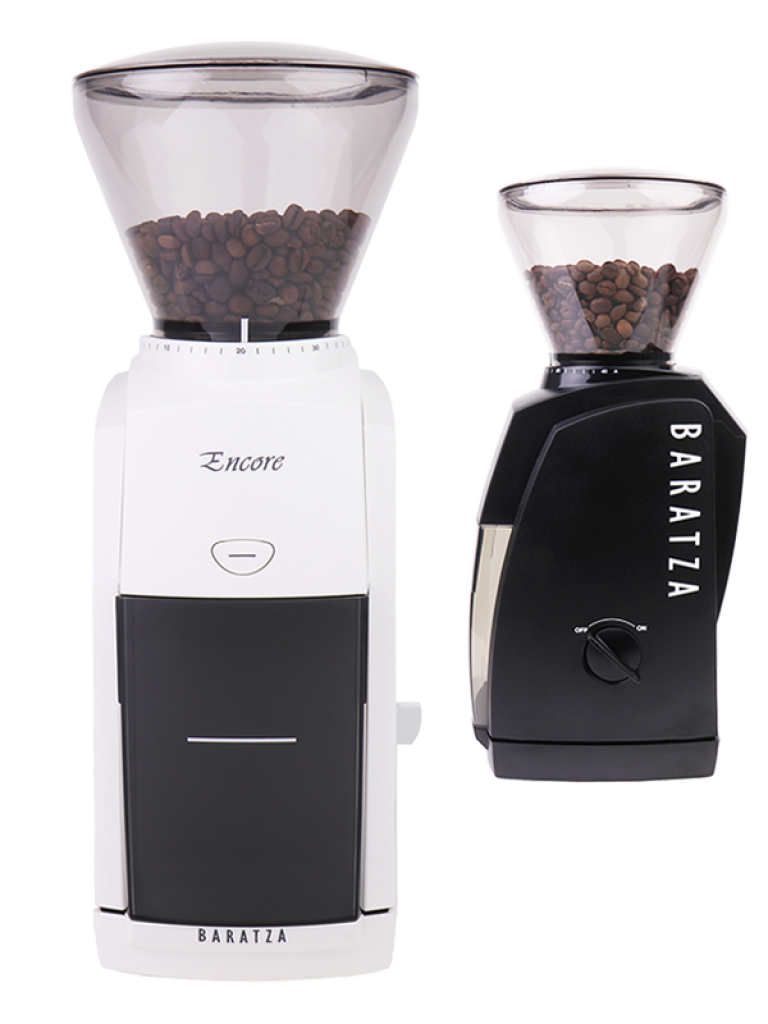
For maximum convenience, an electric grinder makes sense. The most commonly recommended electric grinder for beginners is the Baratza Encore (~$170). Aside from offering some of the best performance per dollar out there, the company is known for stocking replacement parts so you can keep your grinder running for years to come.
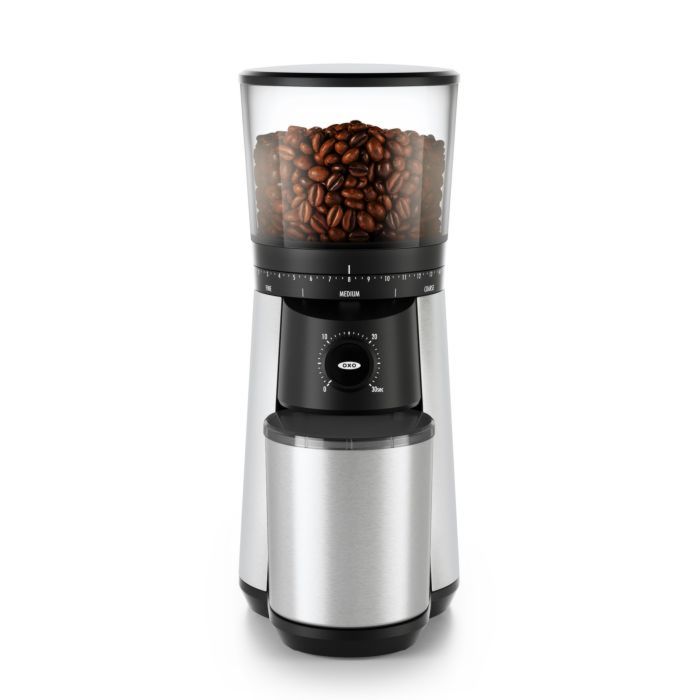
That said, and although I haven’t compared them directly, at the lower end of the price range, I’ve recently been pleasantly surprised with the $105 Oxo Conical Burr grinder.
These grinders are capable of making good coffee, and if you mostly plan to drink your espresso with milk, then having the absolute best grinds isn’t as much of a priority.
What if I want the best quality grinds?
If you do want the best possible quality for your money, then you should almost certainly be getting a hand grinder. To outdo the quality you’d get out of a good $150-$250 hand grinder, you’d almost certainly have to spend upwards of $500 on a machine. And it makes intuitive sense; the money doesn’t go into the motor and the design and shipping logistics of a larger appliance, so more of the cost of a good hand grinder goes larger into the grinding components themselves.
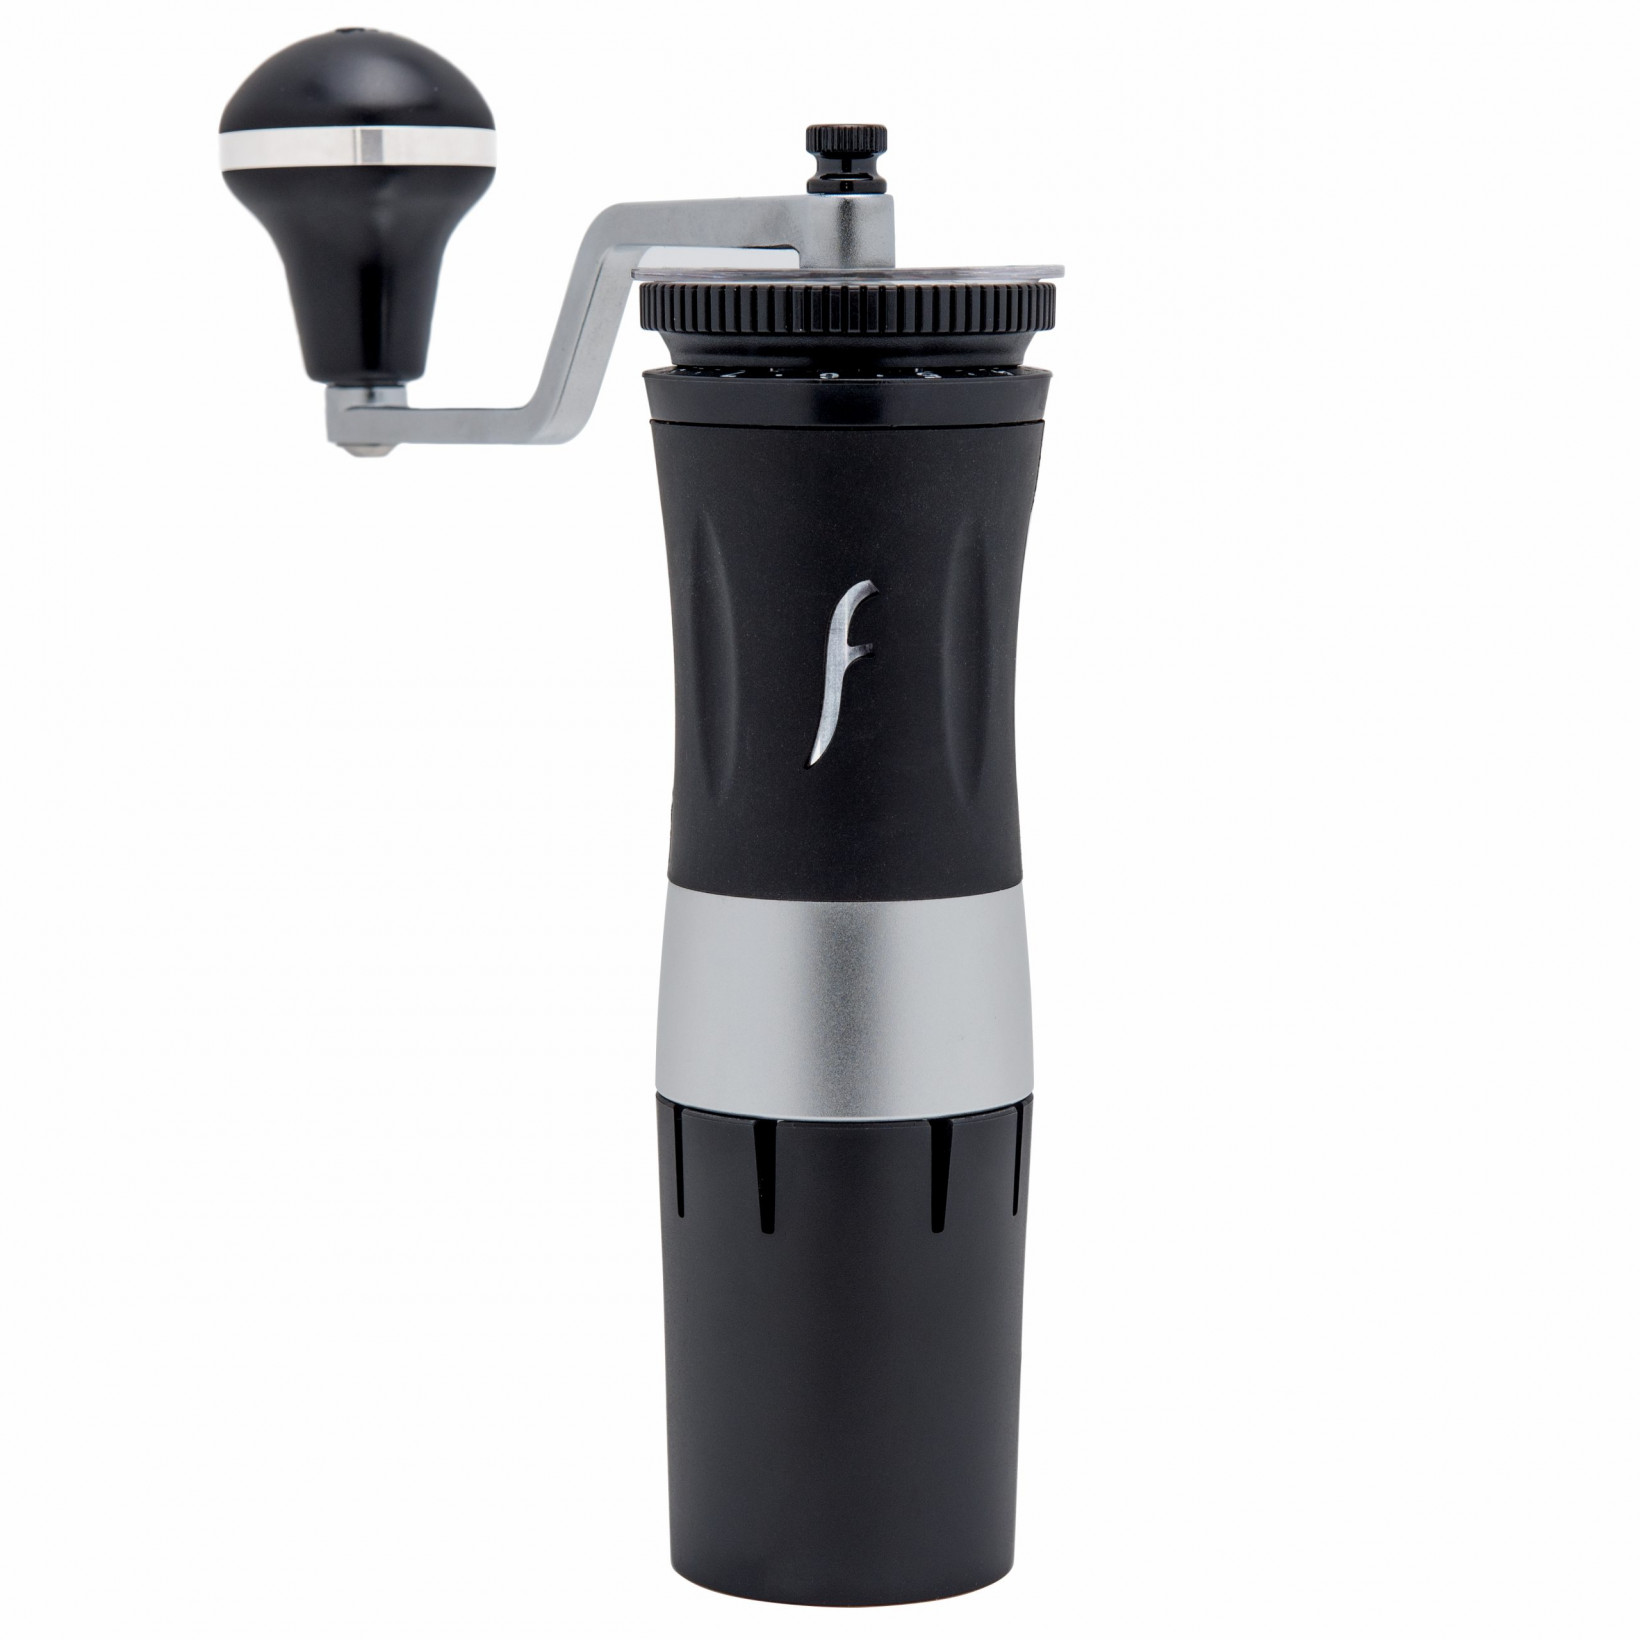
Again, I haven’t tested every hand grinder out there, but the Flair Royal is my personal favorite hand grinder at $189. It’s fast (for a hand grinder), reliable, easy to use, and feels built to last. It grinds super consistently, and you’d probably be spending close to a grand to find an electric grinder that definitively outclasses it.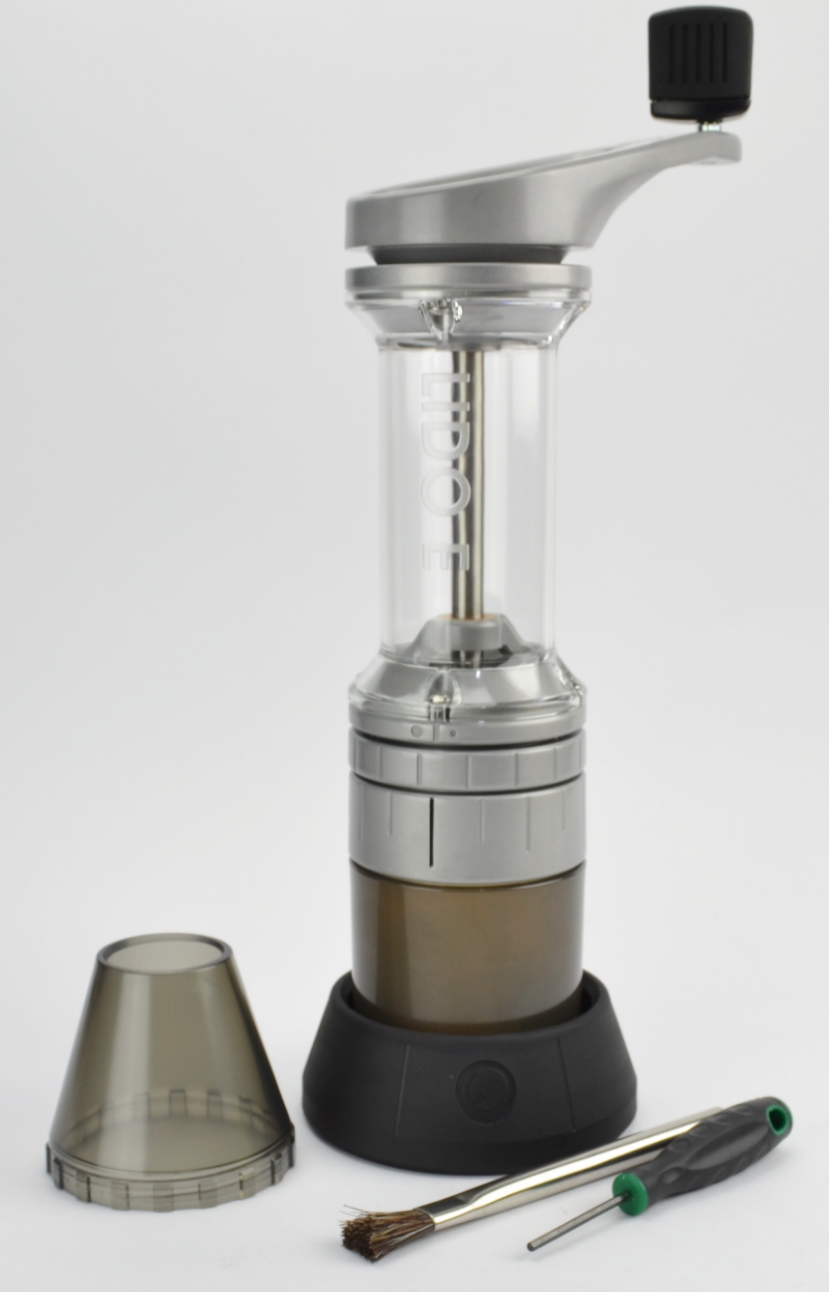
Pro tip: if you want to speed things up, you can actually attach a power drill to the top of the Royal to act as a kind of external motor. I doubt Flair would recommend that and it could very well damage your grinder… but it’s an option you have.
Alternatively, I’ve also had success with the Lido E ($195), a classic in the hand-grinder space, although it’s significantly larger (the larger basket could be a pro if you make a lot of coffee) and it isn’t as intuitive to use. As far as I know, it also cannot be easily attached to a drill.
What coffee machine should I get?
Similar to the grinder question, it depends on whether you want to balance convenience with quality or get the best possible espresso for the money. An electric coffee machine will get you convenience, while a manual espresso maker — using your own arm power to pressurize the coffee — will offer more control and maximize your shot quality.
Gimme coffee fast and easy!
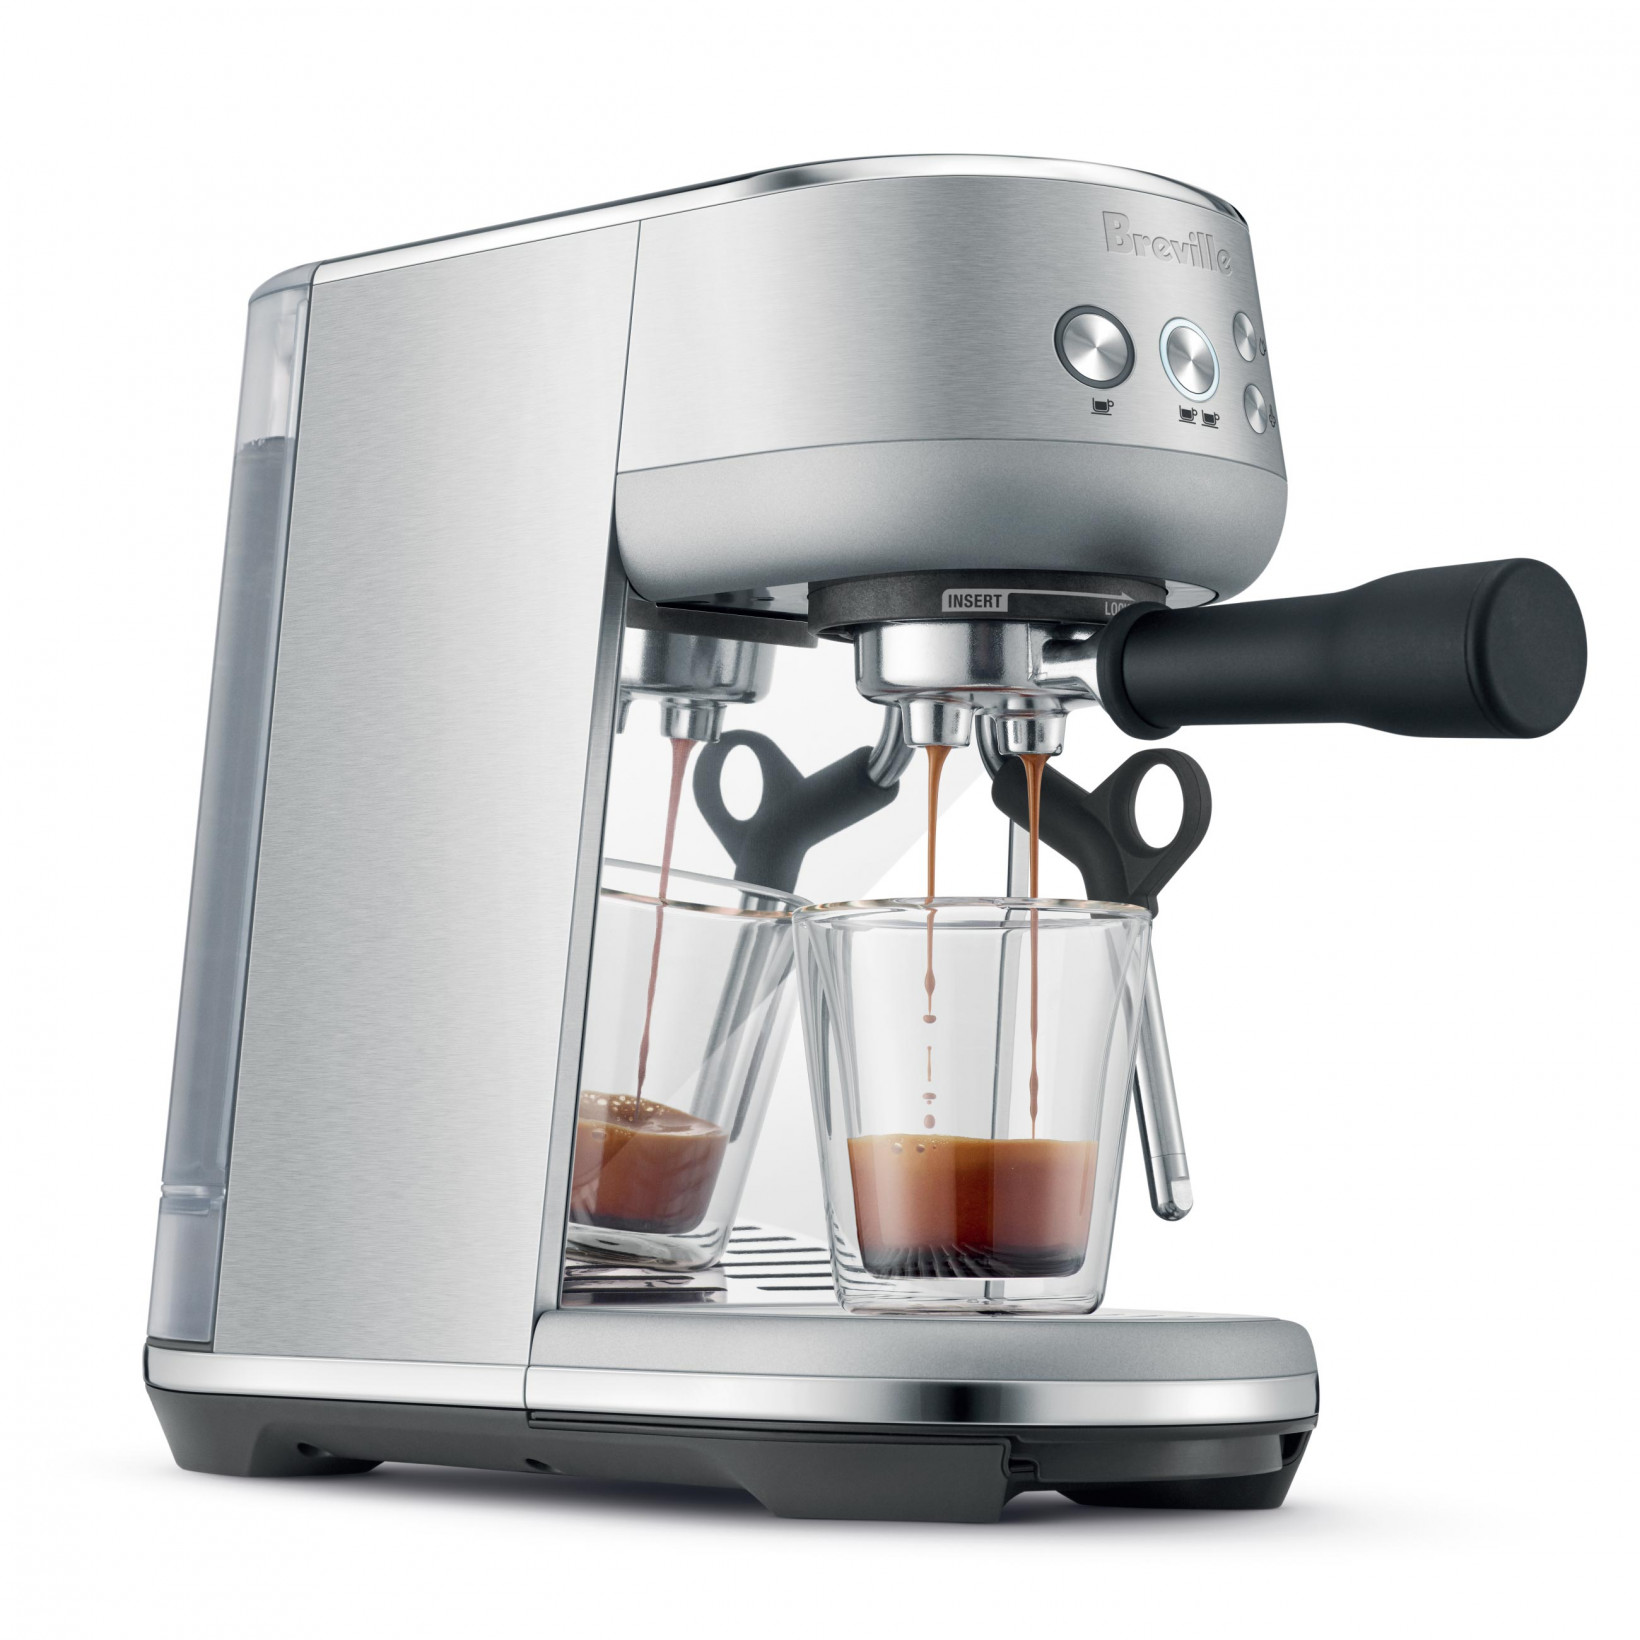
The cheapest espresso machine I would recommend is Breville’s Bambino ($300). It’s one of the exceedingly few electric coffee makers that can make a shot of espresso (with the right grind and settings) comparable to what you’d get from a coffee shop, although for the best results I’d recommend a few cheap upgrades.
Shot quality aside, it’s also super small for an espresso machine, heats up in just 3 seconds (most machines take several minutes from a cold boot), takes up very little counter space, and is super easy to use.
That said, if you’re serious about this whole espresso thing, I’d highly recommend the extra 6 bucks for the single wall, unpressurized basket.
Long story short, the Bambino comes with what’s called a ‘pressurized’ or dual-wall basket. This basically acts as training wheels and makes it easier to get a ‘passable’ shot out of the machine without having to grind as fine or consistently.
Unfortunately, this also means you won’t be able to extract the most flavor out of the coffee. Flavor aside, the pressurized basket can’t quite fit as much coffee, limiting the size of your shots. So do yourself a favor and add the unpressurized basket to your cart. This one upgrade, when paired with a good grinder, turns the Bambino from an acceptable espresso machine to quite a capable one.
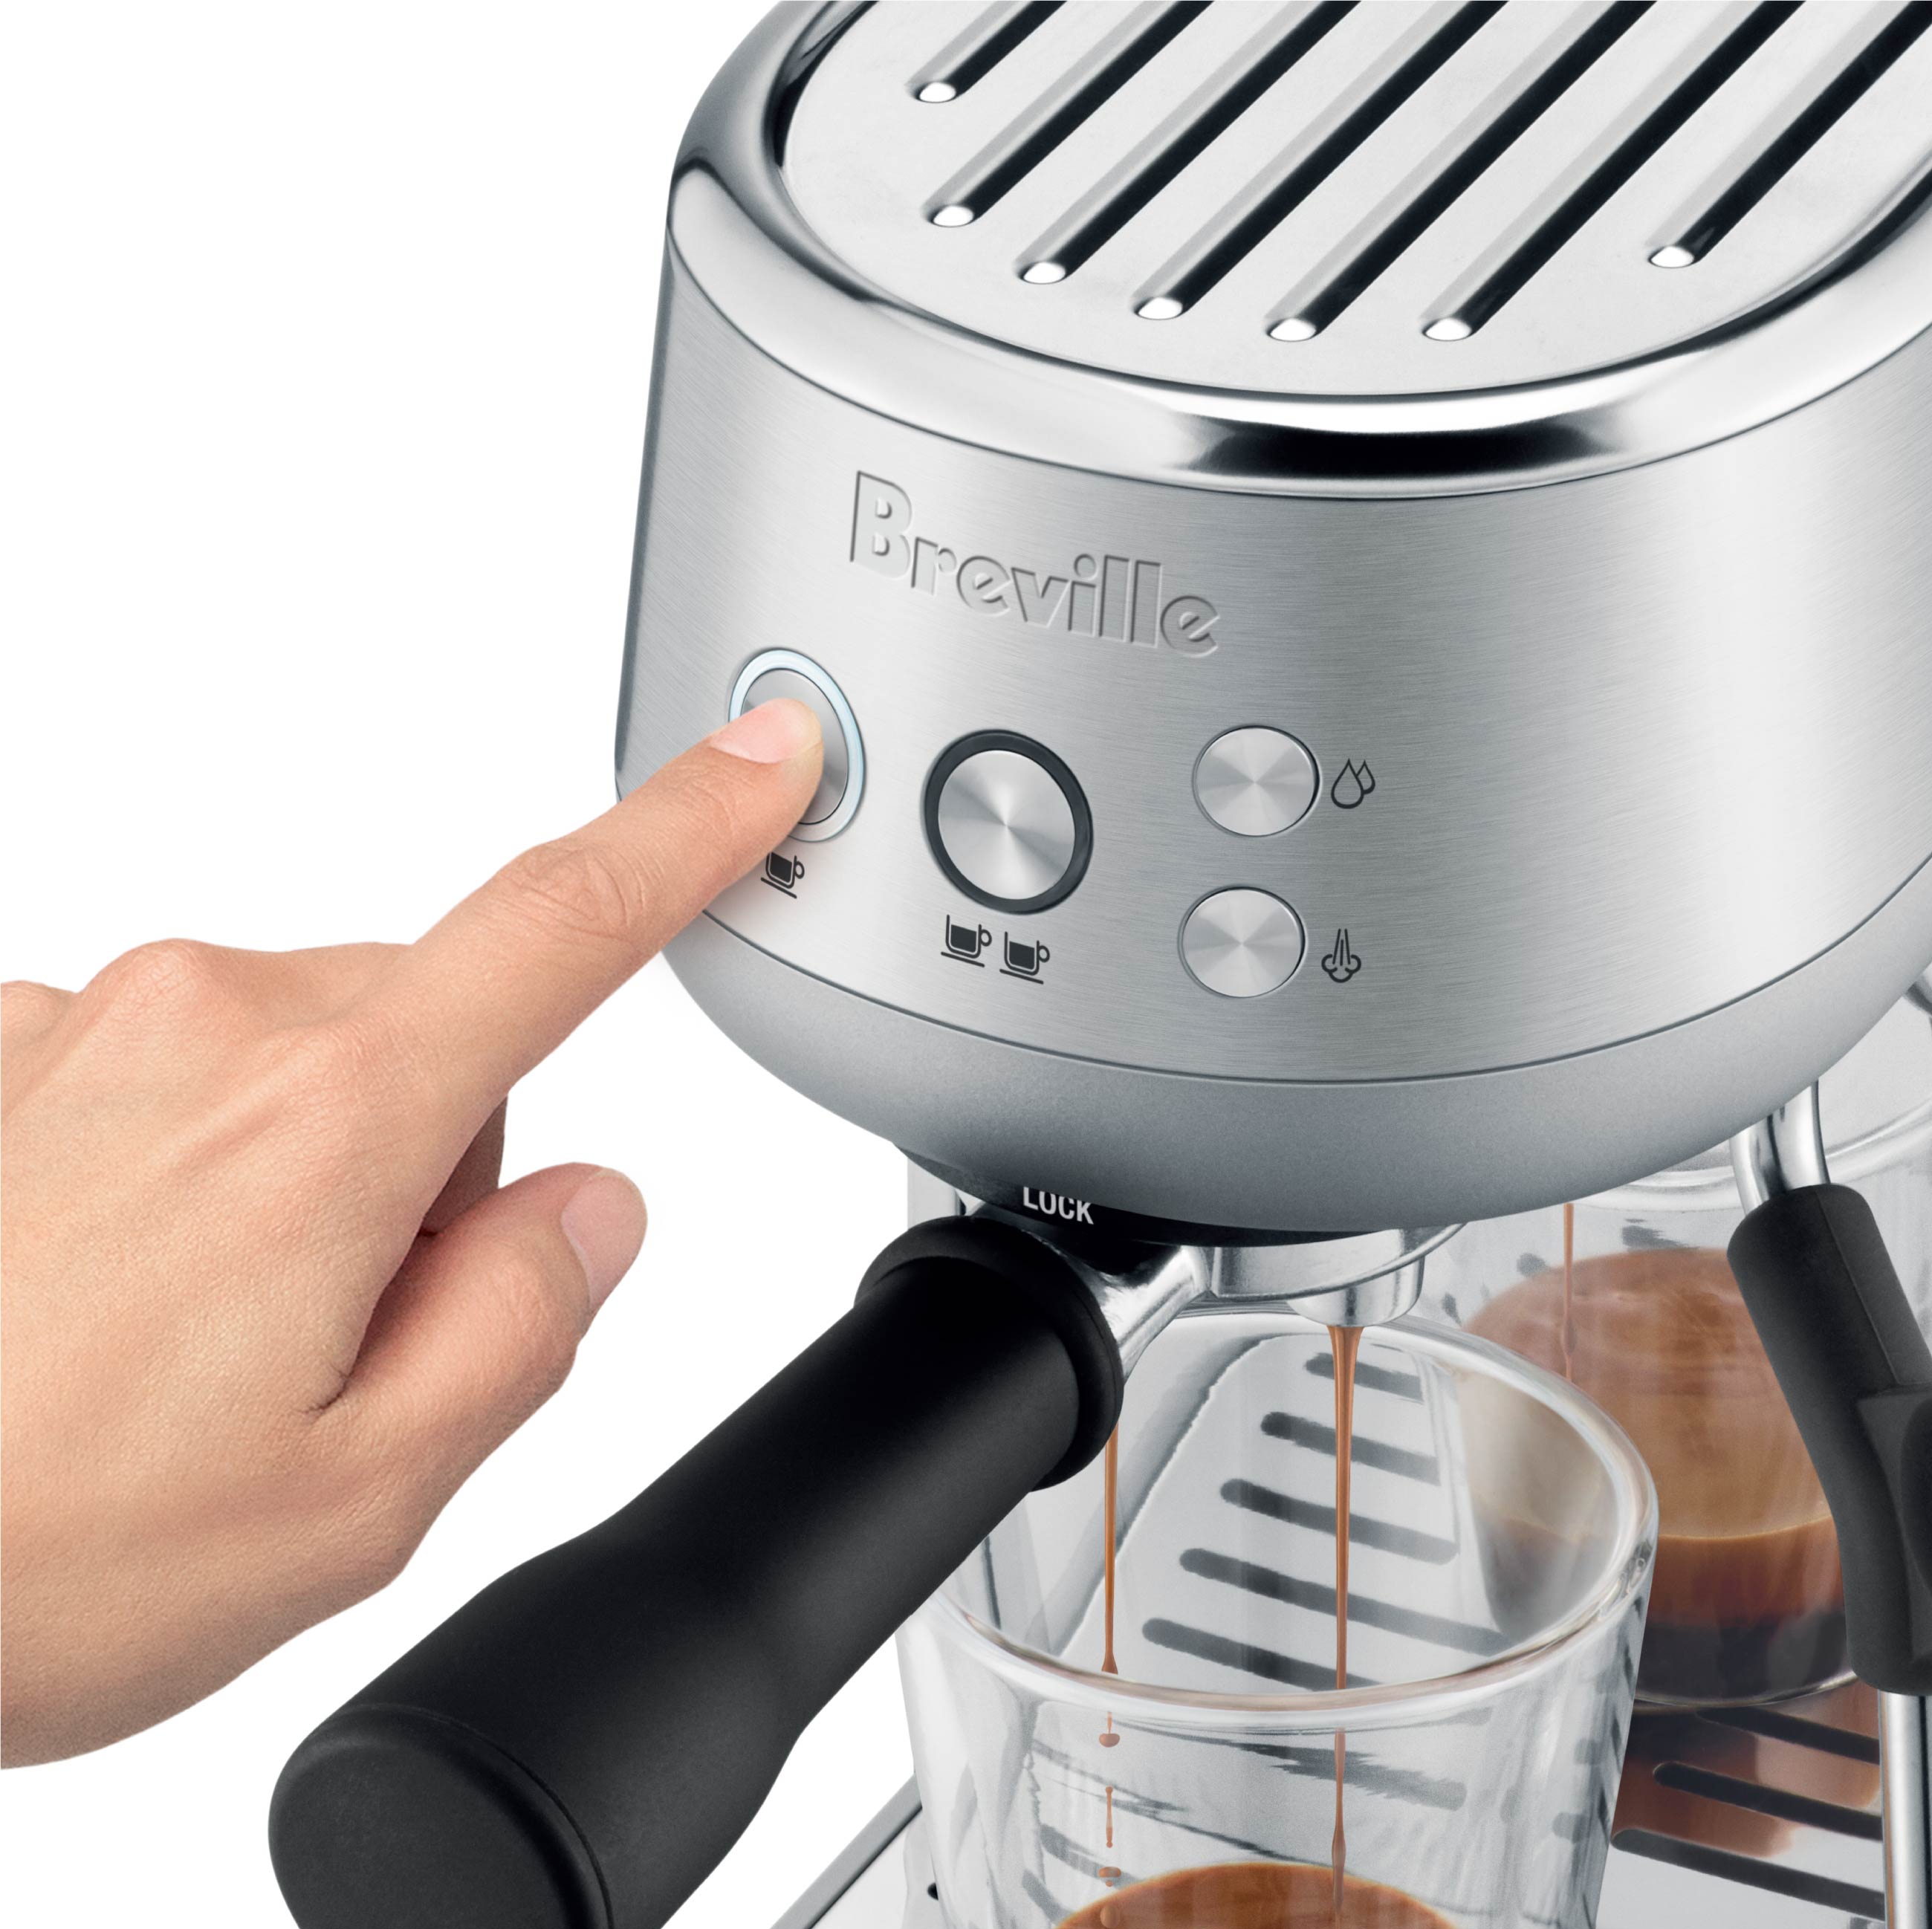
And again, the Bambino is super easy to use; by default, making coffee is as simple as loading the grinds into the portafilter, pressing a button to turn the device on, and then pressing it again to begin the extraction.
Those who want more control can also modify the shot length, and even the pressure levels to a small extent.. As a bonus, the steam wand on the Bambino is surprisingly great given the price.
The device lacks temperature control, however, which makes very light roasts more finicky, but overall it’s a very capable machine once outfitted with an unpressurized basket. The only other upgrade I’d recommend is a beefier tamper; the plastic one it comes with feels quite cheap.
Gimme the best coffee for the money!
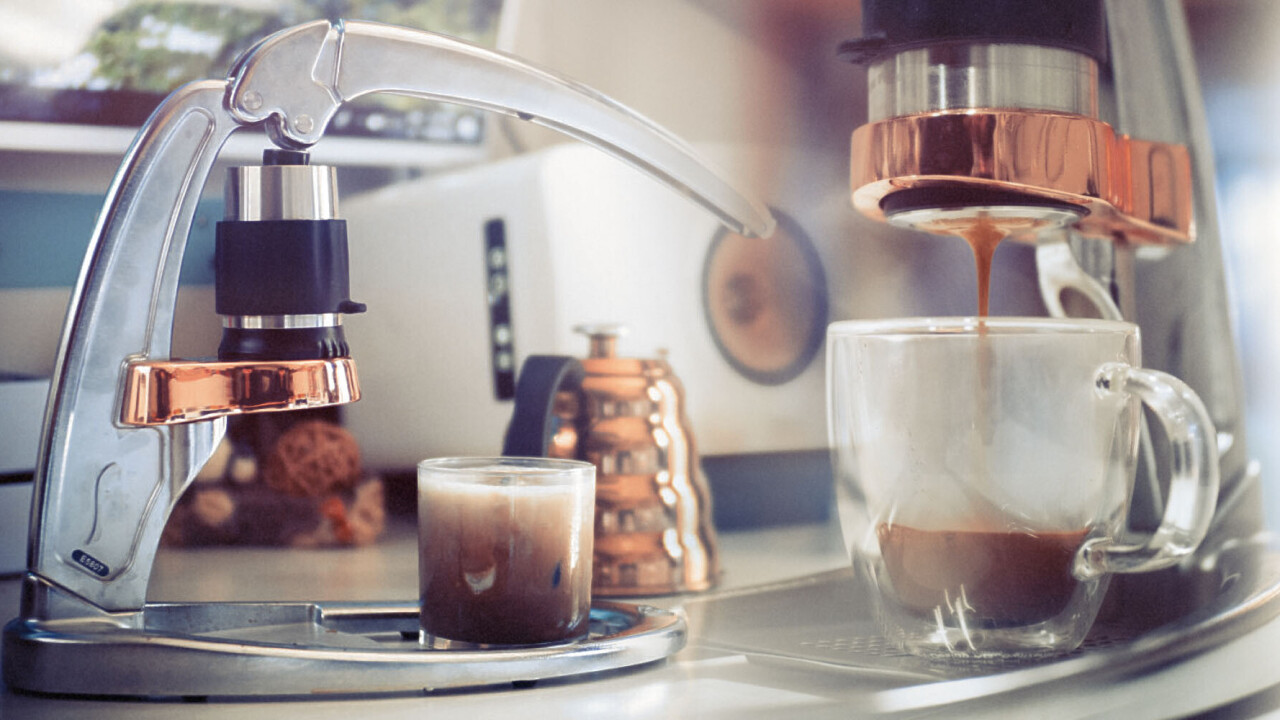
I once again turn to Flair, whose manual coffee makers are able to create coffee as good or better than any coffee I’ve ever had at a coffee shop. There’s a bit more of a learning curve to get there, but the payoff is worth it.
Instead of relying on an electronic pump to create pressure, Flair’s espresso machines rely on your arm power and a good ol’ lever. There’s an elegant simplicity to the machines, plus they look great on your counter too.
Flair makes several models at varying price points, ranging from $125 for the entry-level Flair Neo to $575 for the Flair 58. They also offer various upgrades, especially for the cheaper models, that can make a meaningful difference to your brewing; it’s really a coffee ecosystem.
The Neo, like the Bambino above, comes with a pressured basket by default, so it’s the best choice if you don’t want to worry much about your grinds. But since this guide assumes you’re getting a decent grinder and are willing to learn at least a little, you should add the bottomless portafilter as a ($24) upgrade, or just head straight for the Flair Classic ($165), which also throws in a couple of extra accessories.
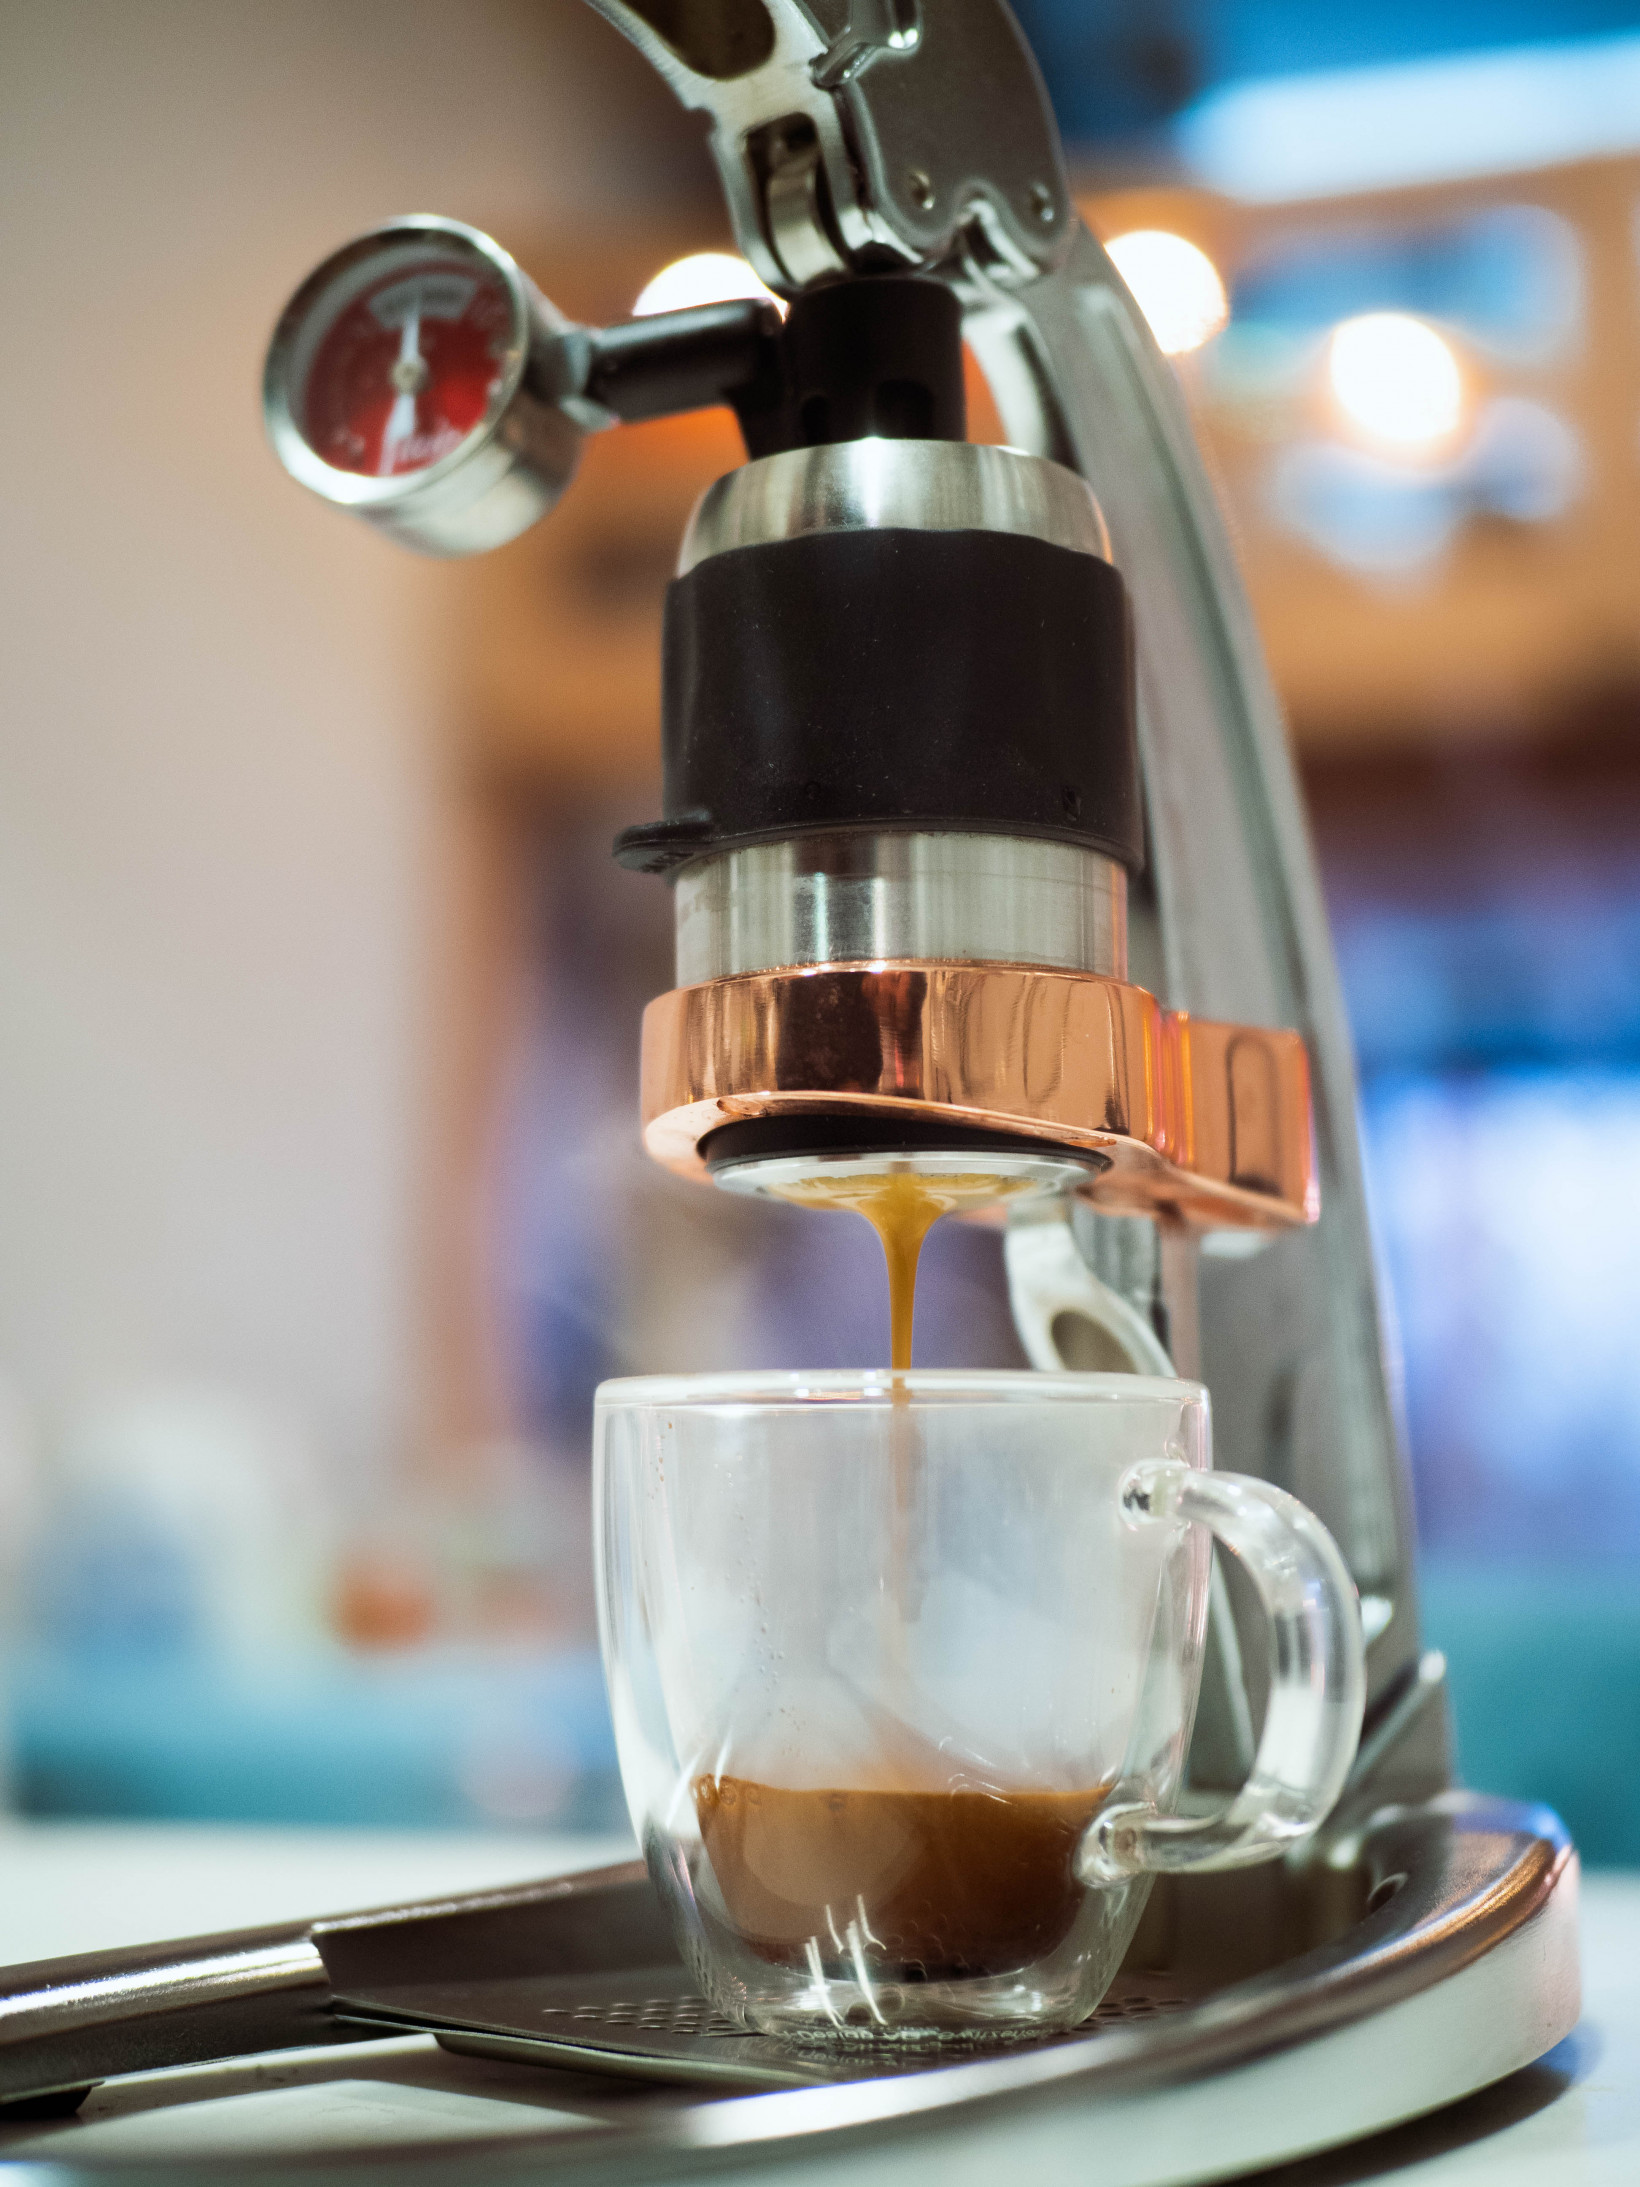
What makes the Flair system special compared to any electronic espresso machine near this price range is that it allows you to fully control the pressure applied to the coffee. This lets you modify a shot on the fly and experiment with different types of ‘pressure profiling’ to really get the most out of the shot. This is especially true if you go for the optional pressure gauge (a $56 upgrade for the Neo and Classic; it’s included with the higher-end models) to get a live read-out for the pressure instead of going by feel.

But even without the pressure gauge, once you’ve pulled a few shots, you learn to get an intuitive sense of how much force to apply and how long to apply it for. In my experience, once you get a general hang for the Flair and you have decent beans, it’s actually hard to pull a bad shot.
If you’re not too concerned about the price, then I’d head straight for the Flair Pro or 58. They’re still far cheaper than equivalent electronic machines, and the 58, in particular, is basically end-game quality.
The only really tricky part is getting the water temperature right as you have to boil the water separately in a kettle; you’d ideally want to pre-heat the Flair’s components prior to starting your extraction. This isn’t a big deal for dark roasts or even many medium roasts, but it may be more problematic with light roasts.
You also won’t be able to steam milk on the Flair machines. For this I’d highly recommend Subminimal’s Nanofoamer ($40); you’ll have to heat up the milk yourself, but unlike many foaming wands, this one will get you basically identical texture to good steamed milk in seconds.
So how do I actually make the espresso?
Again, I’m not going into the nitty-gritty details of making perfect espresso here; that’s the subject of hundreds of articles throughout the web, and the exact specifications will vary depending on your beans, grinder, and espresso machine.
But to give you an idea, the general process looks something like this:
- Grind anywhere from roughly 14-20 grams of beans to the ideal size. Finding the best grind will take some ‘dialing in,’ but your grinder’s manual should tell you where to start.
- Insert grinds into your portafilter (the basket thingy that holds the grinds) and tap the portafilter on the counter a few times to distribute the grinds evenly.
- Tamp the grinds with a fair bit of force (30 lbs or force is the usual recommendation, but it’s more important to be consistent). All the machines in this list include tampers.
- Place the portafilter back on your machine, and begin the extraction.
- Both the Flair and the Bambino allow you to ‘pre-infuse’ the coffee at a lighter pressure before ramping up to full pressure; refer to the device guides for more information on this.
- After pre-infusion, begin full pressure extraction. The entire extraction should take anywhere from roughly 25-45 seconds, depending on your grind size, machine, dosage, etc. If you find your shots are lasting less than 20 seconds, you’ll need to grind finer. If your shots are taking too long or not coming out at all, you’ll need to grind coarser.
- A typical espresso will have a grind:yield ratio of roughly 1:2. In other words, if you put in 20 grams in, it’s a good idea to aim for 40 grams to start. That said, anything from 1:1 (sometimes called a ‘ristretto’) to 1:3 (a ‘lungo) is common.
- If your beans are fresh and your shot was good, you should get a nice layer of bolden brown ‘crema,’ a mousse-like foam at the top of your shot.
- Whenever changing any single variable, such as your grind, dosage, shot time, or tamping pressure, try to keep all others consistent.
That’s an extremely simplified overview, and for further learning, I highly recommend this playlist of videos by Youtuber and 2007 World Barista Champion James Hoffman and this infographic and guide from Barista Hustle.
What type of milk works best?
Controversial take follows: I’m vegan, but even back when I drank several cups of cow’s milk a day, I thought oat milk tasted better. Fight me.
In any case, it’s now my sworn duty to point you to dairy-free alternatives, which are far better for the environment anyway (studies and all that).
Soy and almond milk can work too, but with most brands, I find they don’t tend to blend as reliably with coffee as good oat milk. Oatly, Califia, and Chobani are my favorite brands here in the US. Unlike cow’s milk, flavor and blending quality can vary quite dramatically among brands. Some of them taste like wet cardboard, so choose wisely.
For cow’s milk, most baristas will opt for whole milk (3-4% fat), though 2% milk is usually fine too.
Can you teach me latte art?
No, I suck at it. There are plenty of guides on YouTube though.
Anything else I need to know?
Making good espresso consistently takes some trial and error, but that’s also part of the fun. As long as your beans are fresh and your grind is good, it shouldn’t take you too long before you’re able to pull off a shot that makes you reconsider going to your local coffee shop.
Get the TNW newsletter
Get the most important tech news in your inbox each week.