The goal of this guide is to build a system capable of chatting like you, using your own WhatsApp and Telegram chats as an ML dataset. What we will do could be summarized in the following steps:
- Get your WhatsApp and Telegram data
- Parse it to build an ML-ready dataset
- Train a GPT-2 model
- Chat with the model
So let’s start our adventure!
A quick warning before we get started
It’s always better not to run random scripts on personal information (like personal chat messages).
I guarantee there’s no catch, but you can always check the native code that’s being used: messaging-chat-parser and pistoBot, all the sources are open-source on github.
Get the data
First of all, we need to gather the data from our chat applications. We will now learn how to export data from two of the most commonly used instant messaging apps: WhatsApp and Telegram.
WhatsApp export
We have to export one .txt file for each chat we want to include in the final dataset. So, as described on the official WhatsApp website:
- Open your WhatsApp mobile app
- Pick an individual chat one individual chat (e.g. a chat with one friend) > Tap “more options” (three vertical dots)
- Select the More voice > Export chat voice
- Select Without Media on the pop-up
- Select an Email service (e.g. Gmail app) and add your e-mail address as a recipient
- Wait to receive the mail with chat history as txt file attachment
- Download and store the txt attachment on the computer
- Repeat those steps for every individual chat you want to include
Note that only 1 to 1 chats are allowed (namely individual), we suggest to export chats with the highest number of messages, in order to achieve a bigger dataset and get better final results.
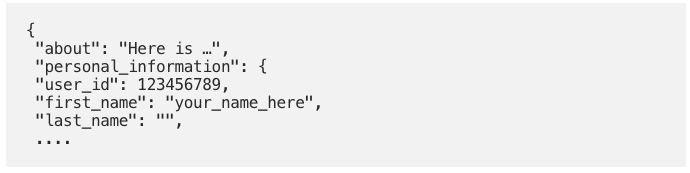
Now you should have more files, each with a structure that looks like the snippet below:

Take note of the text you find under <YourName> placeholder in your exported chats. This parameter is your name for the WhatsApp app and we will use this value later.
1.2 Telegram
The process here will be faster than WhatsApp because Telegram will export everything in a single .json file, without having the limit of exporting one chat at a time.
So, as described on the official Telegram website:
- Open the Telegram Desktop app
- Open the menu on the upper left screen (three horizontal lines)
- Go to settings voice > Click on Advanced >Select Export Telegram data
- Only these fields should be selected:
- Account information, Contact list, Personal chats, Machine-readable JSON
- Be sure nothing is selected under Media export settings and set the size limit to the maximum
- Launch the export and wait
- Rename the output file as “telegram_dump.json”
Now you should have one file named telegram_dump.json with this structure:
2. Parse the data
To train a GPT-2 neural network, first of all we need to pre-process the data, in order to obtain a single .txt with a machine-learning compatible structure.
2.1 Google Colab
For the sake of simplicity and since the ML model we will use requires a GPU to work, we are going to use Google Colab for the next step.
If you don’t know what Google Colab is, check this other article.
2.2 Start the notebook
Open this Colab notebook and follow these steps:
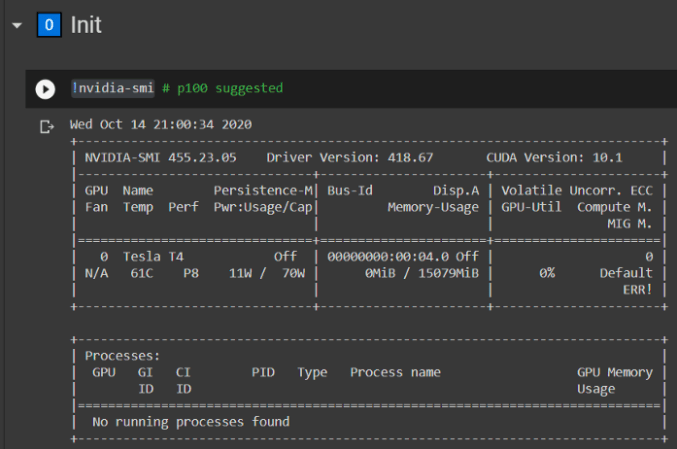
- Run the first block of cells called under the “0️⃣ Init” chapter
- Press “Run Anyway” on the pop-up
- Make sure that the first command !nvidia-smi shows that a GPU is connected (p100 is suggested)
- If no GPU is connected, go to Runtime > Change Runtime type > Hardware accelerator > GPU
2.3 Load the data
To work with the data, we need to upload them on Colab, into the right folders.
WhatsApp chats
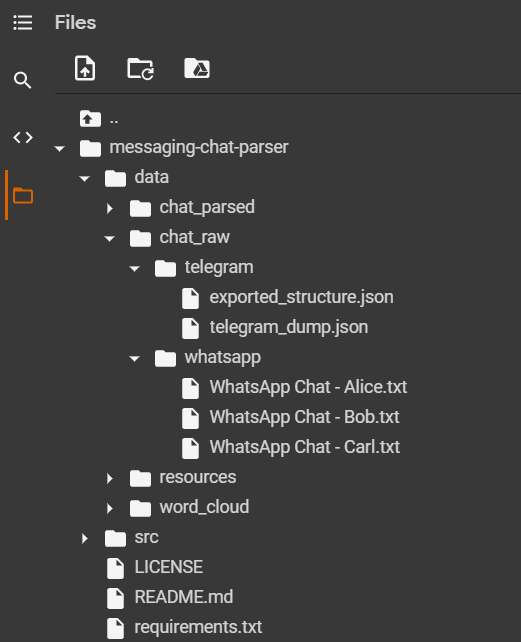
Select all your .txt files and upload everything into the following notebook folder:
./messaging-chat-parser/data/chat_raw/whatsapp/
Telegram JSON
Get the file telegram_dump.json and upload it into the following notebook folder:
./messaging-chat-parser/data/chat_raw/telegram/
2.4 Parse the data
Now, run all the cells up until the block “2️⃣ Parse the data”.
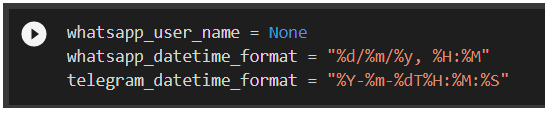
Here we need to replace the variable “whatsapp_user_name” with your WhatsApp name, called <YourName> on the 1.1 chapter.
You can also change the date format parsing system if some of the exported data show a different format due to local time formatting.
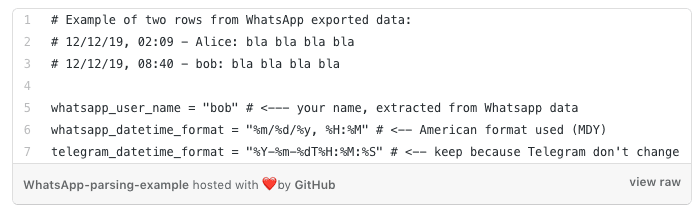
So, for example, if my name is “Bob” and I’m from America, the code I should use is the following:
3. Train a GPT-2 model
Now execute the cell under the “3️⃣ Train a GTP2 model” notebook chapter, it will run a new training using your provided data.
A progress bar will be shown, and the training could take up to 10 hours, it depends mostly on which GPU type Colab is running and how many much messages were provided.
Wait until the process ends.
4. Chat with the model
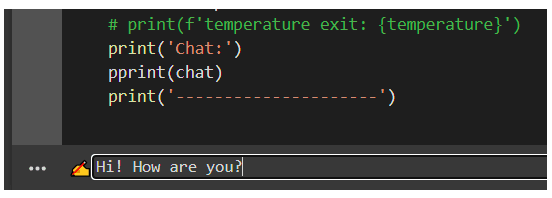
After the training is completed, run all the remaining notebook cells: the last one will show a text block with a ✍ symbol on the left.
You could use this text box to insert the messages you want to “send” to the ML model. So write your message and then press enter.
4.1 How read the results
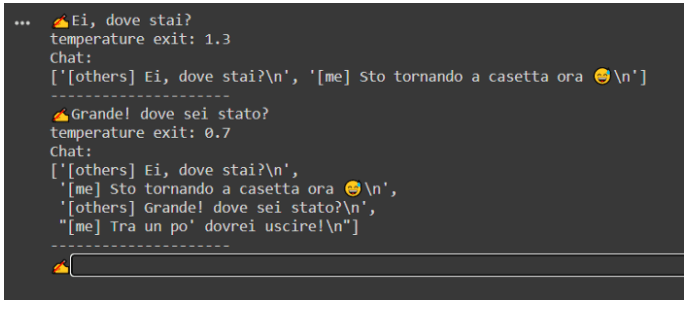
After the first message is sent, the system will prompt some information about the conversation.
You will now see the most interesting results as a list of messages:
- Messages starting with the tag [others]:
The ones you have sent to the model - Messages starting with the tag [me]:
The ones generated by the model.
After the replied message is generated, you could continue to chat for a total of 5 messages. After this, you could re-run the cell to start a new conversation with the model.
5. Conclusion
So in this guide we have seen how simple it is to train your GPT-2 model from scratch, the task is simple (but not trivial!) only thanks to to aitextgen package that runs under the pistoBot hood.
Note that if your chat messages are in English you could easily obtain better results than the ones we got with this standard approach, since you could use the transfer learning from a GPT-2 pretrained model.
The pistoBot repository allows you to train (or fine-tune) different models, including the chance to start from a GPT-2 pretrained model: check the repository folder for more information.
We have chosen the standard, un-trained GPT-2 model so that even the non-english users could use this AI.
This article was written by Simone Guardati and originally published on Towards Data Science. You can read it here.
Get the TNW newsletter
Get the most important tech news in your inbox each week.