
In recent years, Redis has become a common occurrence in a Node.js application stack. Though its most popular use case is caching, Redis has many other use cases where you can take advantage of its blazing-fast in-memory database.
In this tutorial, we are going to give you a quick introduction to Redis. We’ll also use Redis to create a simple cache for a Node application to see how it impacts its performance.
What is Redis?
Redis is an open-source (BSD licensed), in-memory data structure store used as a database, cache, and message broker.
You can think of it as a No-SQL database, which stores data as a key-value pair in the system memory. Redis supports disk-persistent data storage, too, if needed.

The 💜 of EU tech
The latest rumblings from the EU tech scene, a story from our wise ol' founder Boris, and some questionable AI art. It's free, every week, in your inbox. Sign up now!
Redis has support for storing multiple data structures and data types, including strings, lists, hashes, sets, and sorted sets. Supported data structures give Redis the versatility for many use cases.
Redis is best in situations that require data to be retrieved and delivered to the client in the least amount of time.
Redis use cases
One of the most popular use cases of Redis is caching.
What is caching?
Caching is the process of storing copies of data in caches to allow applications to access and retrieve data faster. The goal of caching is speeding up data access operations better than a database, or remote server could allow. It is especially the case for expensive (in time) operations.
As a back-end developer, our task is to complete the clients’ requests as fast as possible. Sometimes, queries require several operations like retrieving data from a database, performing calculations, retrieving additional data from other services, etc., that drag our performance down.
It is here where caching excels as we can process the data once, store it on a cache and then retrieve it later directly from the cache without doing all those expensive operations. We would then periodically update the cache so that users can see updated information.
[Read: ]
Caching & Redis
Since Redis is an in-memory database, its data access operations are faster than any other disk-bound database could deliver. It makes Redis the perfect choice for caching. Its key-value data storage is another plus because it makes data storage and retrieval much simpler.
In this tutorial, we are going to see how to do caching with Redis and Node.js.
Redis for real-time analytics
Redis promises sub-millisecond long data processing operations. It makes Redis a perfect candidate for applications that rely on real-time data analysis.
For example, you can use Redis to store user identities and their transaction details when implementing a real-time fraud detection service. Redis even provides an AI-supported faster transaction scoring system and faster statistical models to perform this use case better.
Other use cases in real-time analytics include real-time inventory management systems and gaming leaderboards.
Redis for session management
If your application uses sessions to track authenticated users and manage user-specific data, Redis is a perfect fit to use as session storage. Using Redis could significantly improve the system’s performance while making it easier to process users’ data, including credentials, recent activities, and even a shopping cart like system.
Redis as a Queue
You can use Redis to queue application tasks that take a long time to complete. You can implement FIDO (first-in, first-out) queues or create delayed queues to delay task implementation until a pre-scheduled time.
Caching with Node and Redis
Now, let’s start with the primary focus of this tutorial: using Redis for caching in a NodeJS application.
The process of caching with Redis is quite simple. When we receive a user request to a route that has caching enabled, we first check if the requested data is already stored in the cache. If yes, we can quickly retrieve data from Redis and send the response.
However, if the data is not stored in the cache, which we call a cache miss, we have to first retrieve the data from the database or the external API and send it to the client. We also make sure to store the retrieved data in the cache so that the next time the same request is received, we can simply send the cached data to the user faster.
Now that you have a clear idea of what we are going to do let’s start the implementation.
Install Redis
If you haven’t already, you need to install Redis for this tutorial.
You can download the binaries and compile them easily using the following commands.
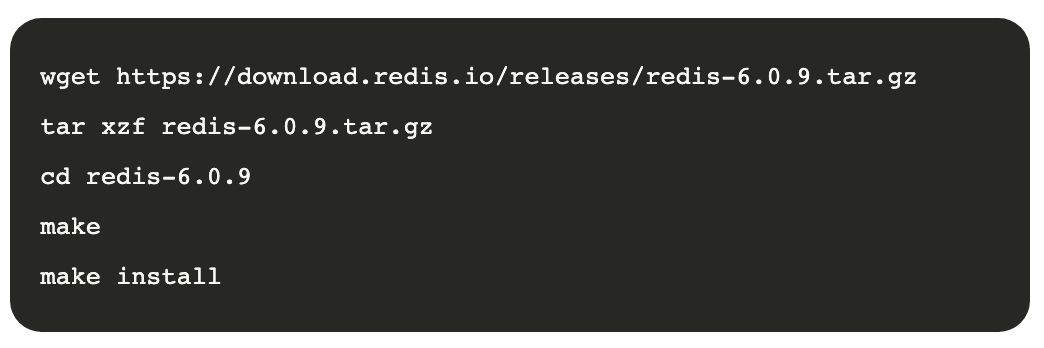
To make sure that the Redis server runs without an issue, send a ping to the server using the redis-cli.

If you receive pong as a response, the Redis server is running successfully.
Read the official quick start guide to get a better idea if something goes wrong.
Build the NodeJS application
Basic set-up
Set up the initial boilerplate for the Node application like this.
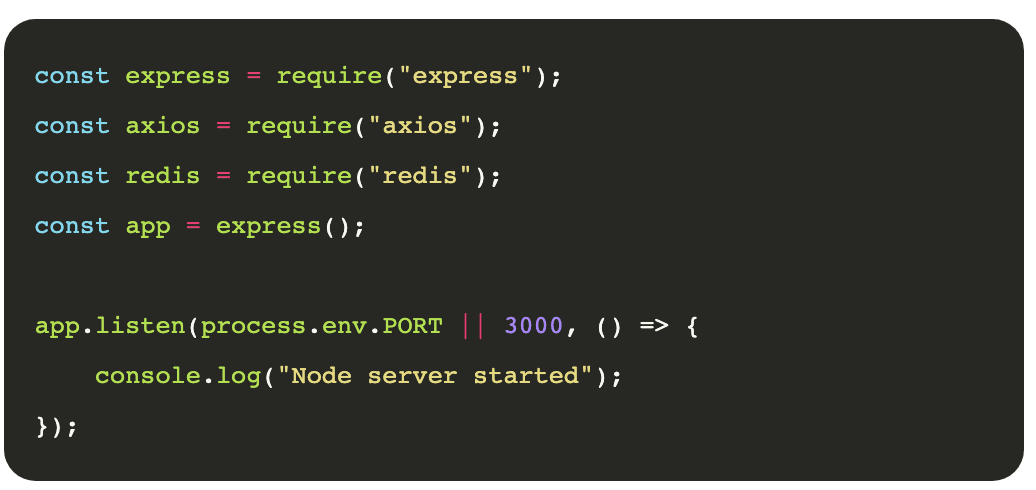
Note how we use two additional packages named axios and redis. redis is the standard Redis client for Node. We use axios to retrieve data from an external API for this tutorial.
Before continuing, make sure to install those two packages using npm.

Retrieve data from the external API
We will be using the GitHub Jobs API to get data related to programming jobs available in different locations in the world.
You can pass a search term related to the job you are looking for to the API and retrieve an array of available jobs in json format. A sample request to the API looks like this.

In our Node application, we define a route named /jobs, which retrieves job data from the above API and send them back to the client.
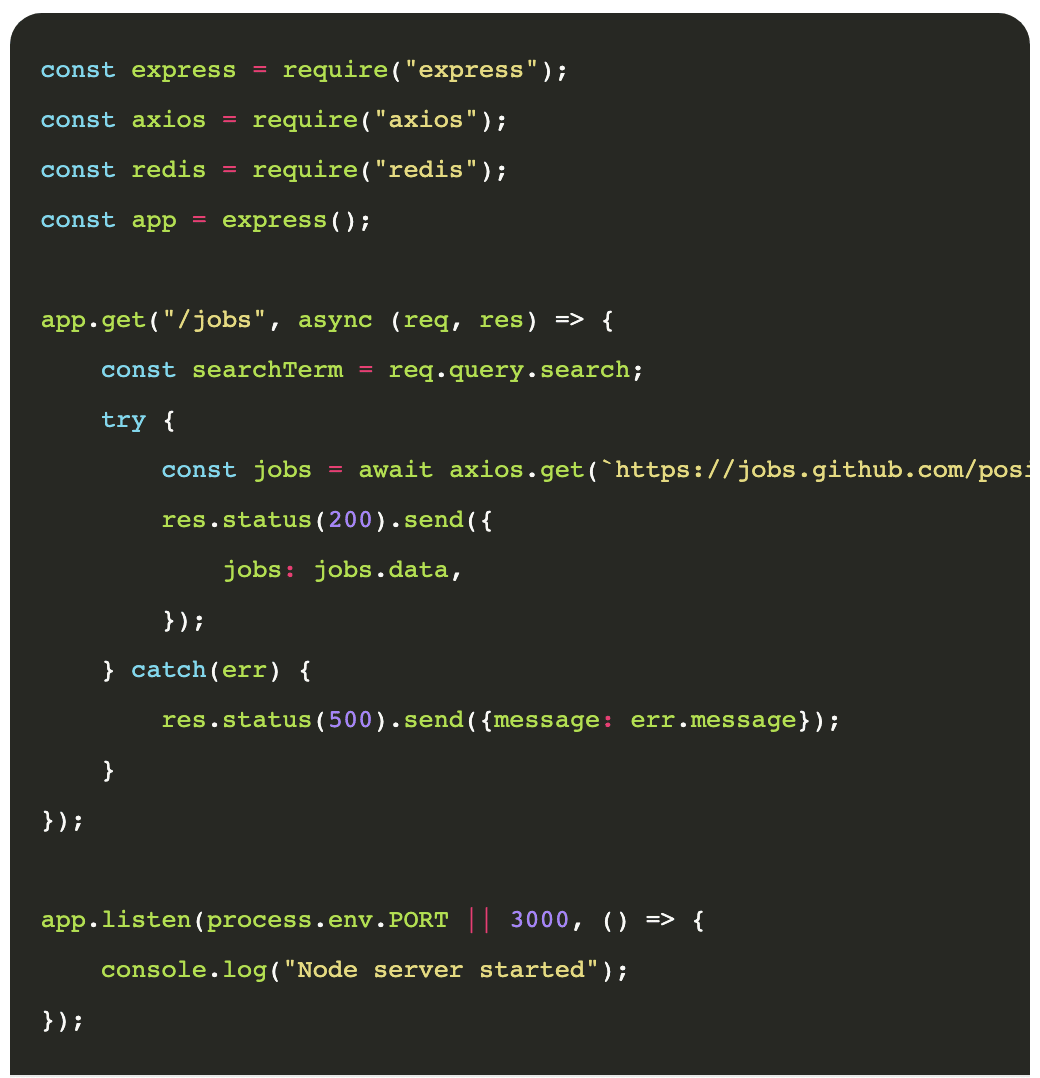
Here, we use axios to send a GET request to the GitHub Jobs API with the user-provided search term.
Let’s see how the route works now using Postman.

Caching the results
Now, let’s see how we can improve the performance of the application by caching.
First, we need to connect to the Redis server through our application. We use the installed redis package for this task.

Redis server listens on port 6379 on default. So, we pass the port number to connect to Redis and create a client.
Then, implement the logic to store and retrieve data from the cache.
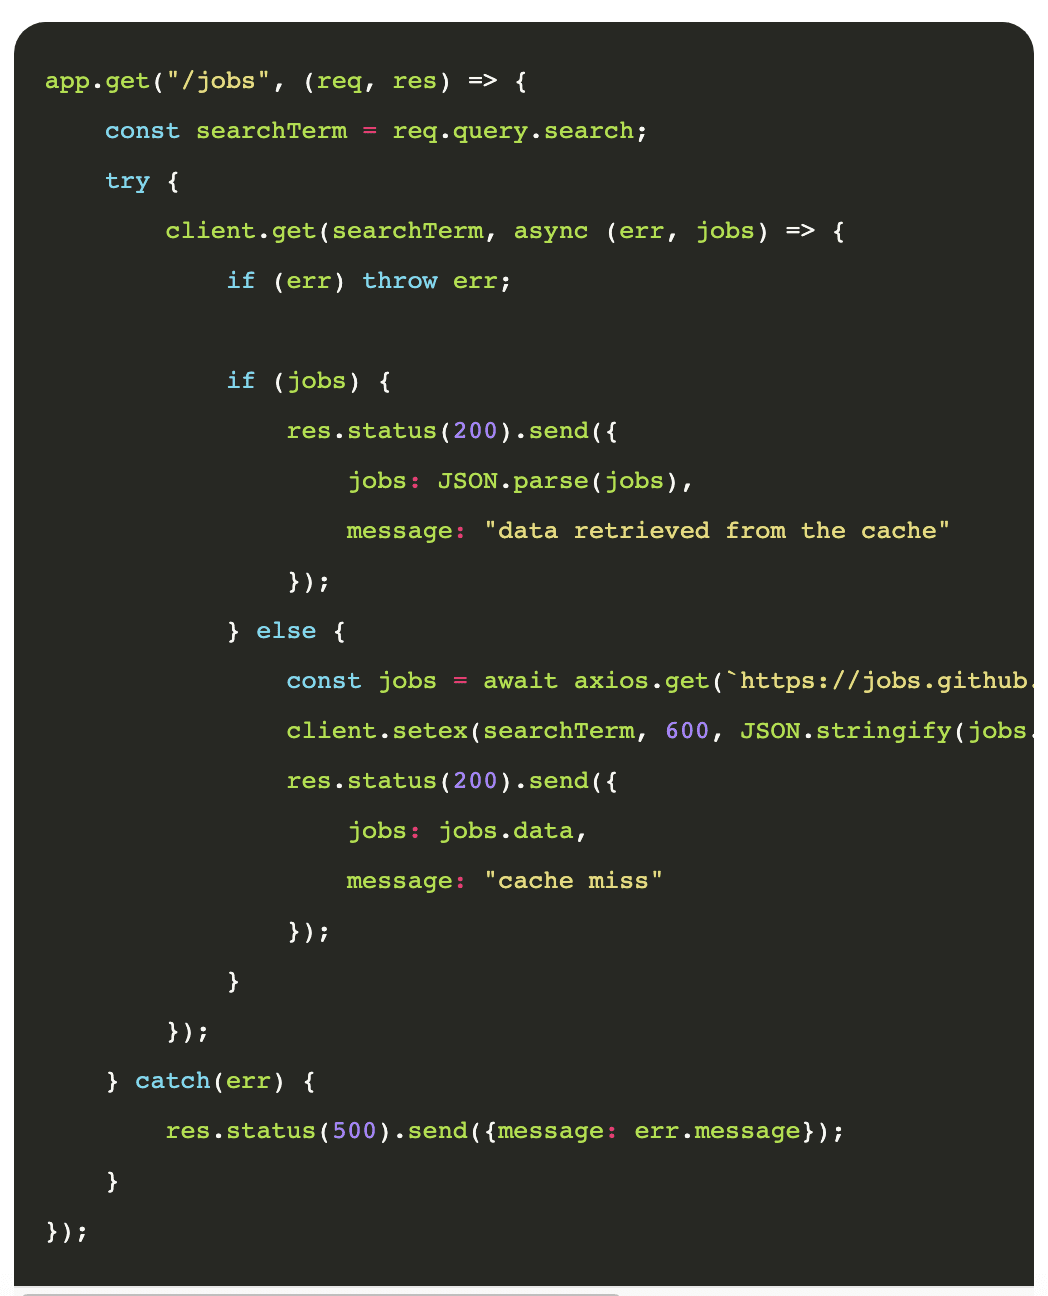
What’s going on here?
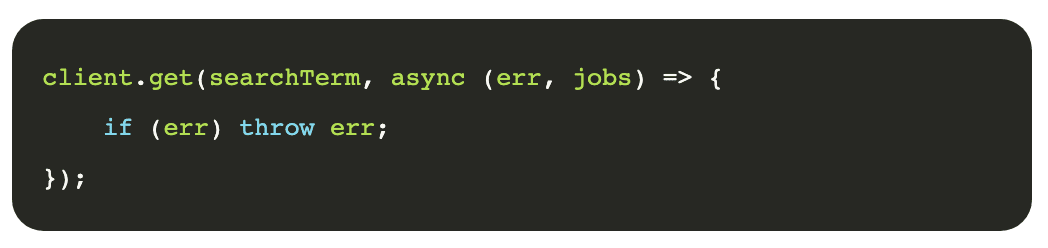
When we receive a client request to the /jobs route, first, we get the search term sent with the request’s query parameters.

Then, we try to retrieve the requested data from the cache bypassing the search term, which we use as the key when storing data in the cache. Since the Redis package doesn’t have native support for promises, we have to pass a callback to process the retrieved data.
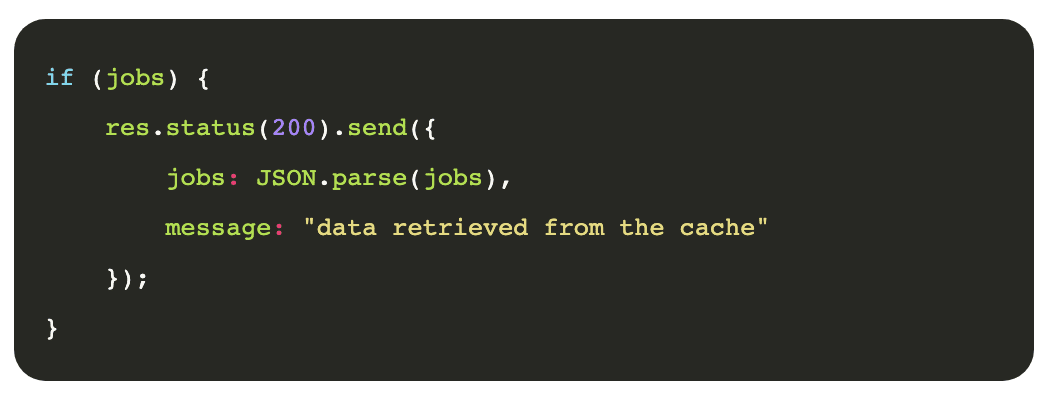
If the value returned from Redis is not null, it means the related data exists in the cache, so it’s easy to return that data in the response. Just make sure you cast back the string to JSON.
If the returned value was null, we have to send a request to the external API to retrieve relevant data.
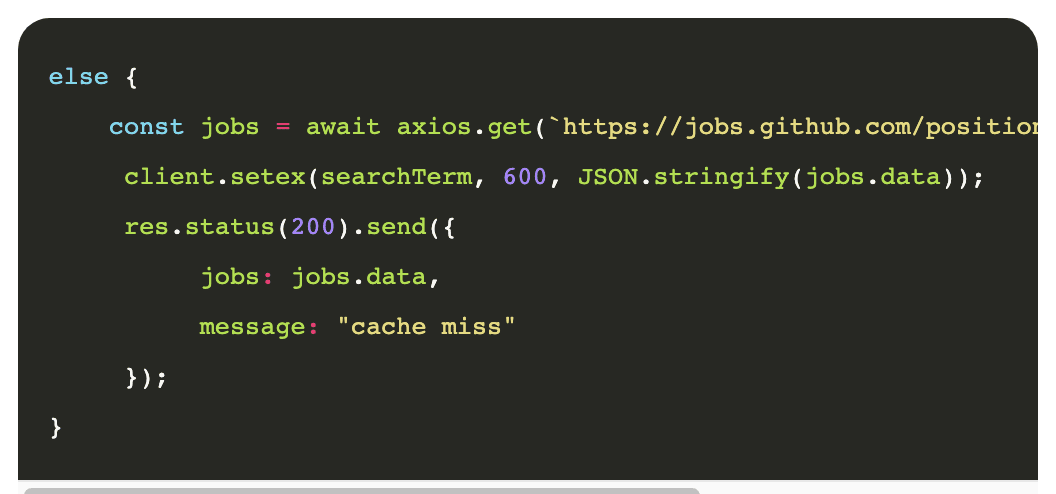
When we get the data from the API, before sending it back, we store it in Redis so that the next time the same request is sent to the Node server, it can respond with data stored in the cache instead of requesting them from the API.
Note how we use the setex function to store data in the cache. Using the setex function specifically, instead of the regular set function, we can set an expiration time to the stored key-value pair. Because we set a value for expiration time, Redis will automatically remove that key-value pair from the cache when the elapsed time expires.
Full source code
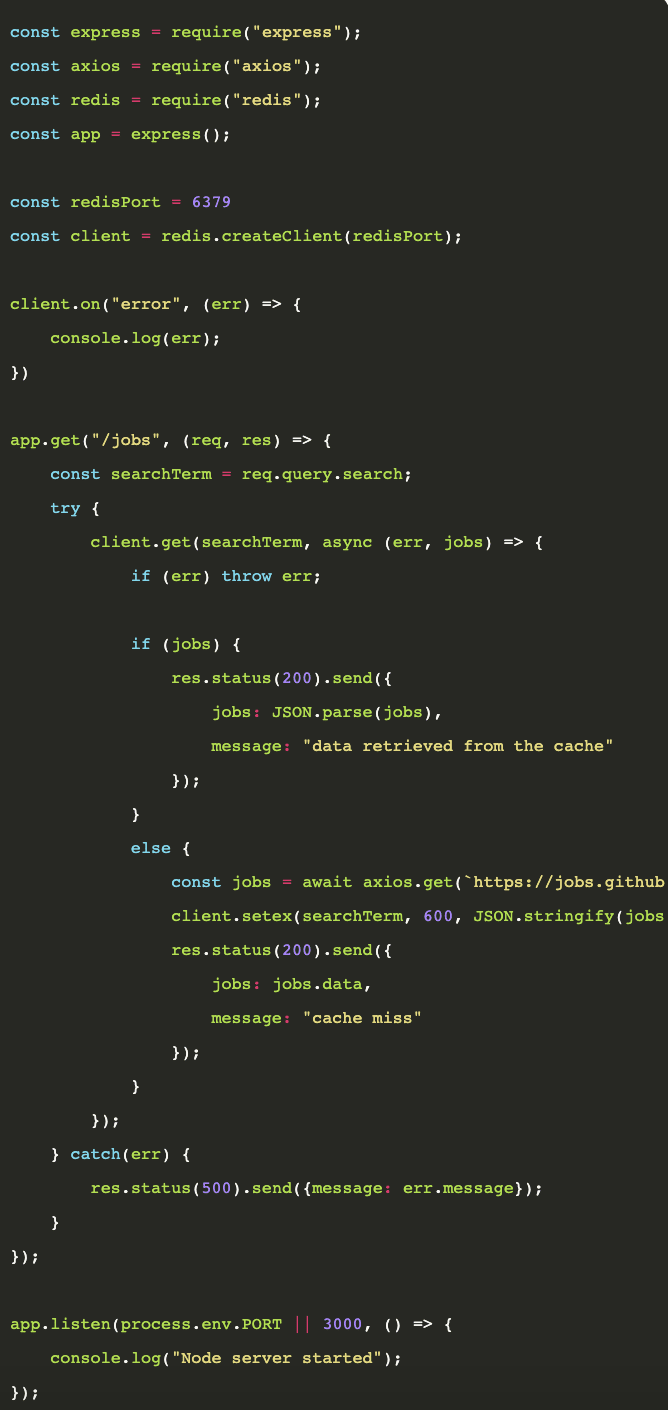
That’s it. We have created a simple cache for our application. That wasn’t so hard, was it?
Moment of the truth: time comparison
We’ll see how the use of a cache impacted the performance of our app. I used Postman to send requests to the server and measure request completion time.

The first time you send a request to the server with a new search term, the application takes longer to respond (over 7 seconds) because it has to get the data from the external API. The second time you make the same request, the server responds faster as the results already exist in the cache.
The request completes within 10 ms. It’s a huge performance increase from the application we saw before without the cache.
Summary
In this tutorial, we gave you a quick introduction to Redis and created a simple cache with it for a Node.js application. Now you can use Redis to cache frequently queried data in your application to gain a considerable performance increase.
You can also look into how to take advantage of the best features of Redis in other use cases too.
This article was originally published on Live Code Stream by Juan Cruz Martinez (twitter: @bajcmartinez), founder and publisher of Live Code Stream, entrepreneur, developer, author, speaker, and doer of things.
Live Code Stream is also available as a free weekly newsletter. Sign up for updates on everything related to programming, AI, and computer science in general.
Get the TNW newsletter
Get the most important tech news in your inbox each week.